Welcome to “Basics of Yanado”. Let’s learn some basic things and get on with organizing your daily routine, business or personal life.
1. Organize Your Work With Teams
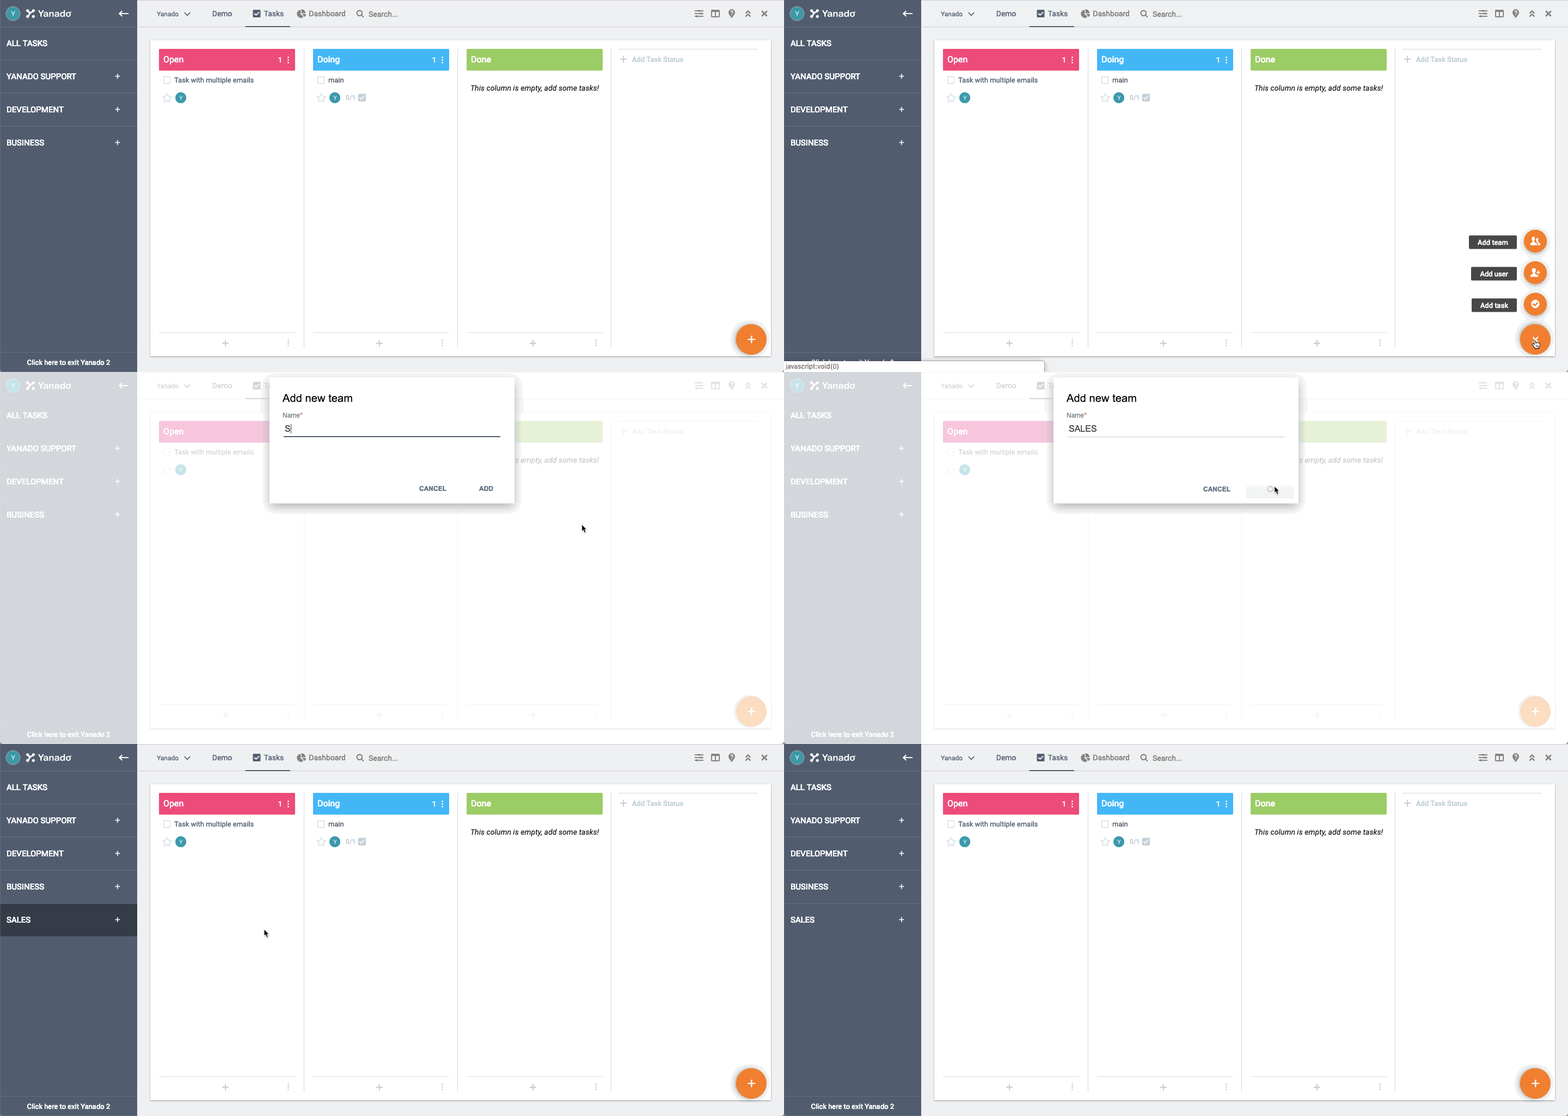
Creating a new team is the first thing you should do, once you’ve created your Yanado account. With teams you can organize your projects, plans and your company.
To create a new team, click on the orange button at the bottom right of the Yanado. Simply enter team name and click on the Add button.
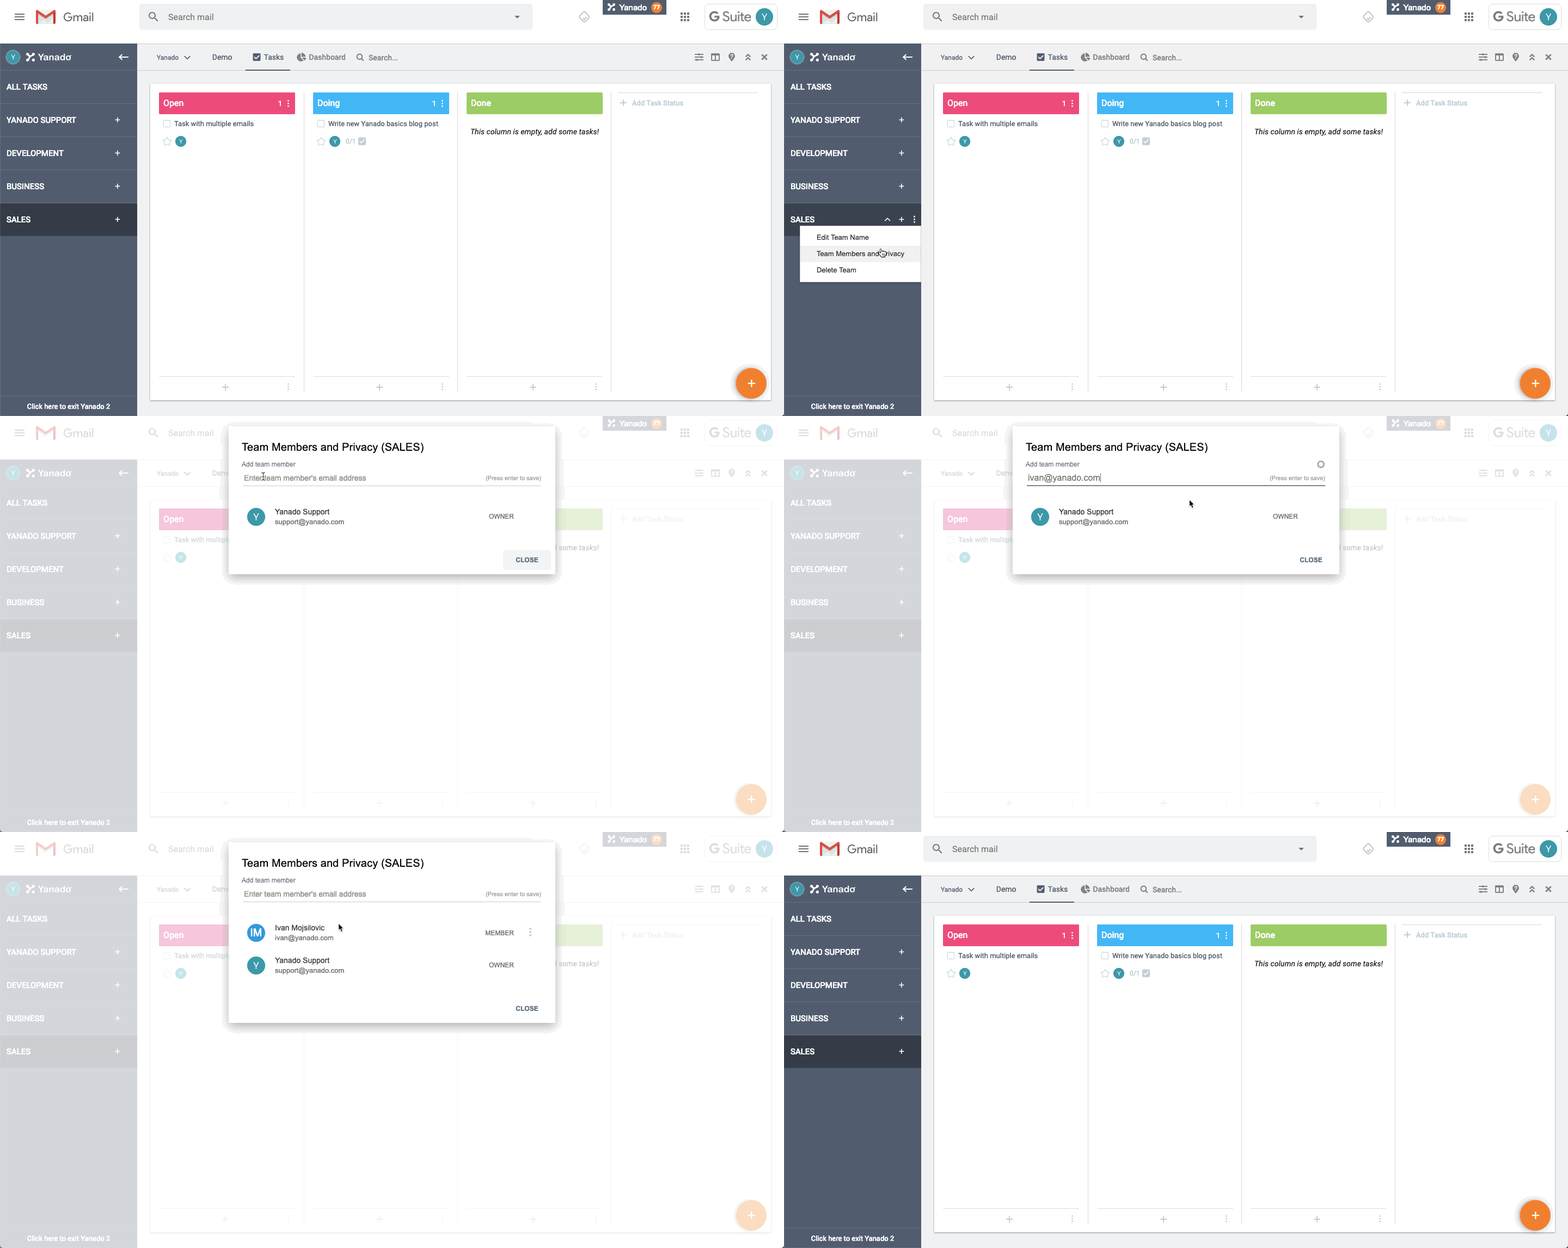
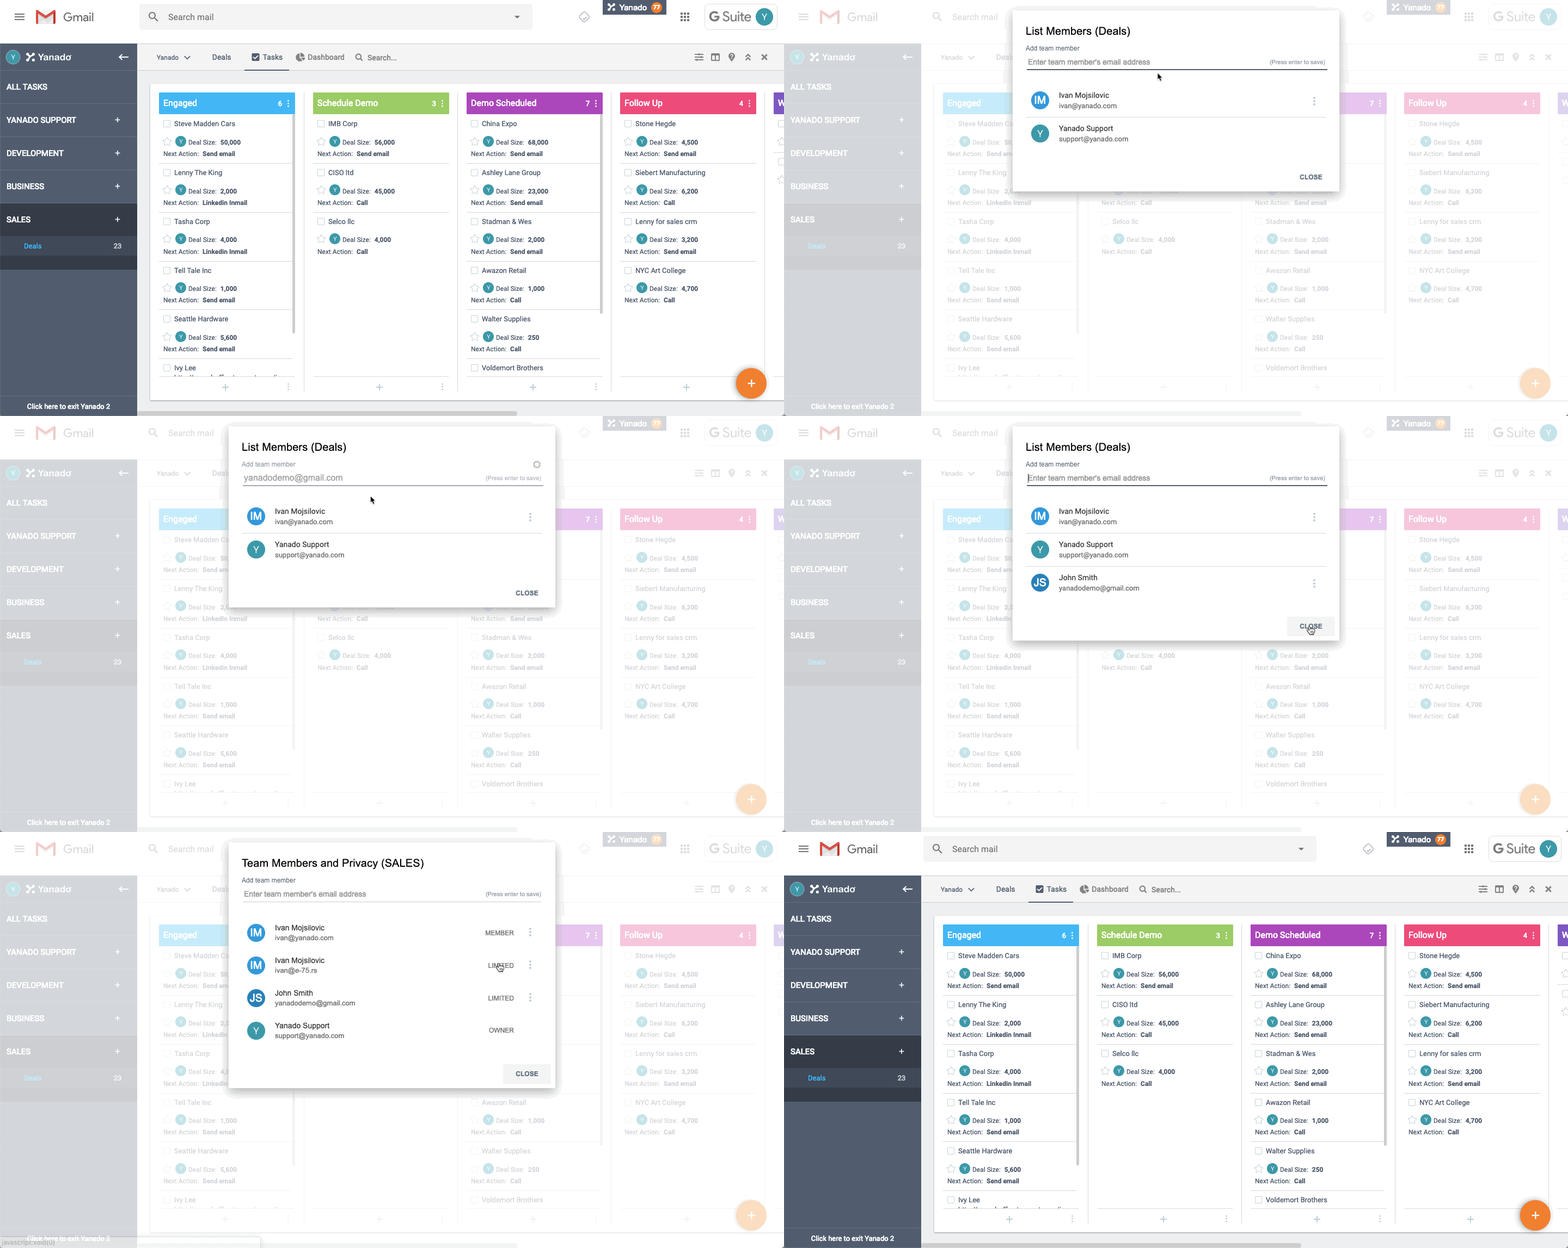
Once you have created a team, you can invite team members into it. To do so, click on the more options icon next to the team’s name in the left sidebar and select Team Members & Privacy option. Type user’s email address in the dialog and select it in the drop down list you will see.
2. Organize Your Projects with TODO Lists
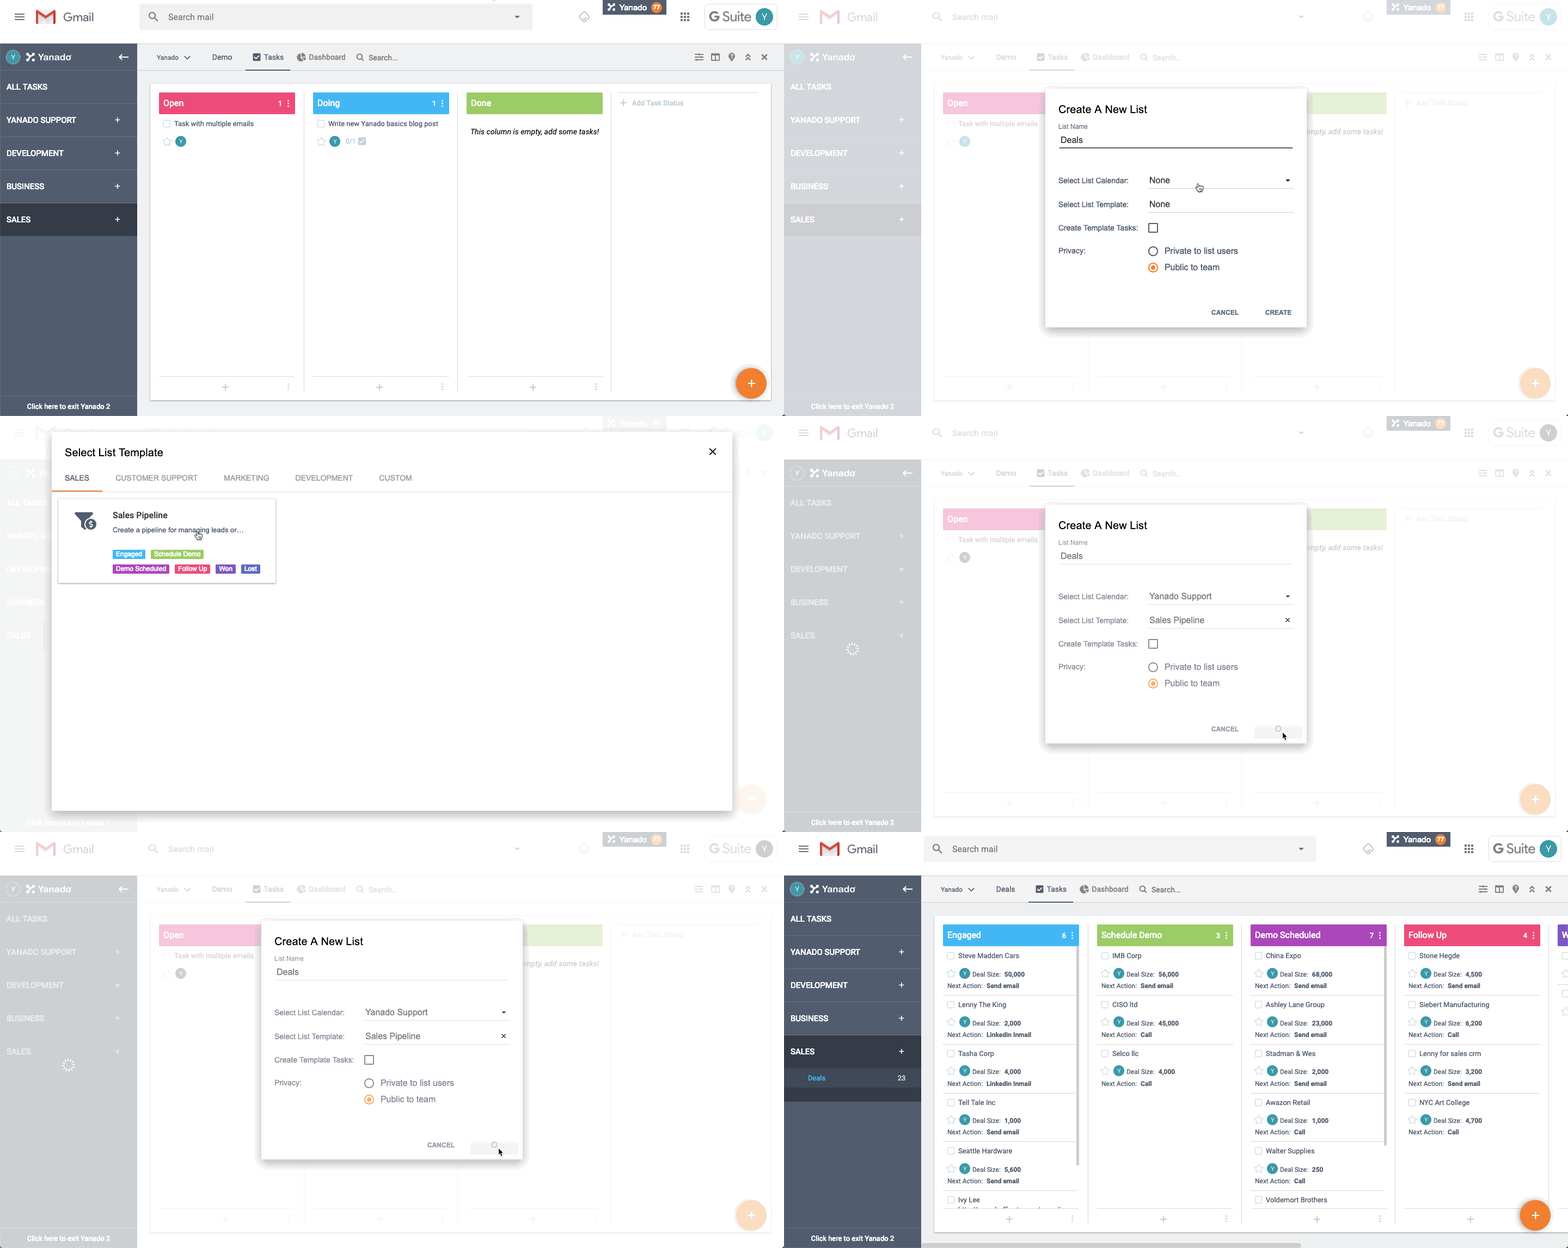
Adding a new list is a piece of cake. Find the plus icon next to the team’s name in the left sidebar and click on it. Besides typing in a list name, there are several options to set:
- Select list calendar – here you can select which Google calendar this list should be attached to.
- Select list template – to speed up the setup process, select one of the list templates we created for you.
- Create template tasks – if you have selected a template list, you can decide if you want to create template tasks from it or not.
- Privacy – a list can be private where only invited team members can have access to it, or public to a team where all team members can see it.
Once you have set the desired options, click on CREATE button at the bottom right corner of the dialog.
NOTE: It’s important to note that you can invite users directly to a list. They will have a LIMITED role and will only have access to the list you invited them to.
Now that you’re done with creating your teams and lists let’s move on to adding some tasks to it.
3. Add Tasks and Create Tasks from Emails
A task is an activity that needs to be accomplished within a defined period of time. But keeping it simple, a task is a business meeting, strategic plan, dentist appointment or anything else you want to do, you’re already doing or you need it to be done.
Depending on the view you are using, there are several ways to make a new task:
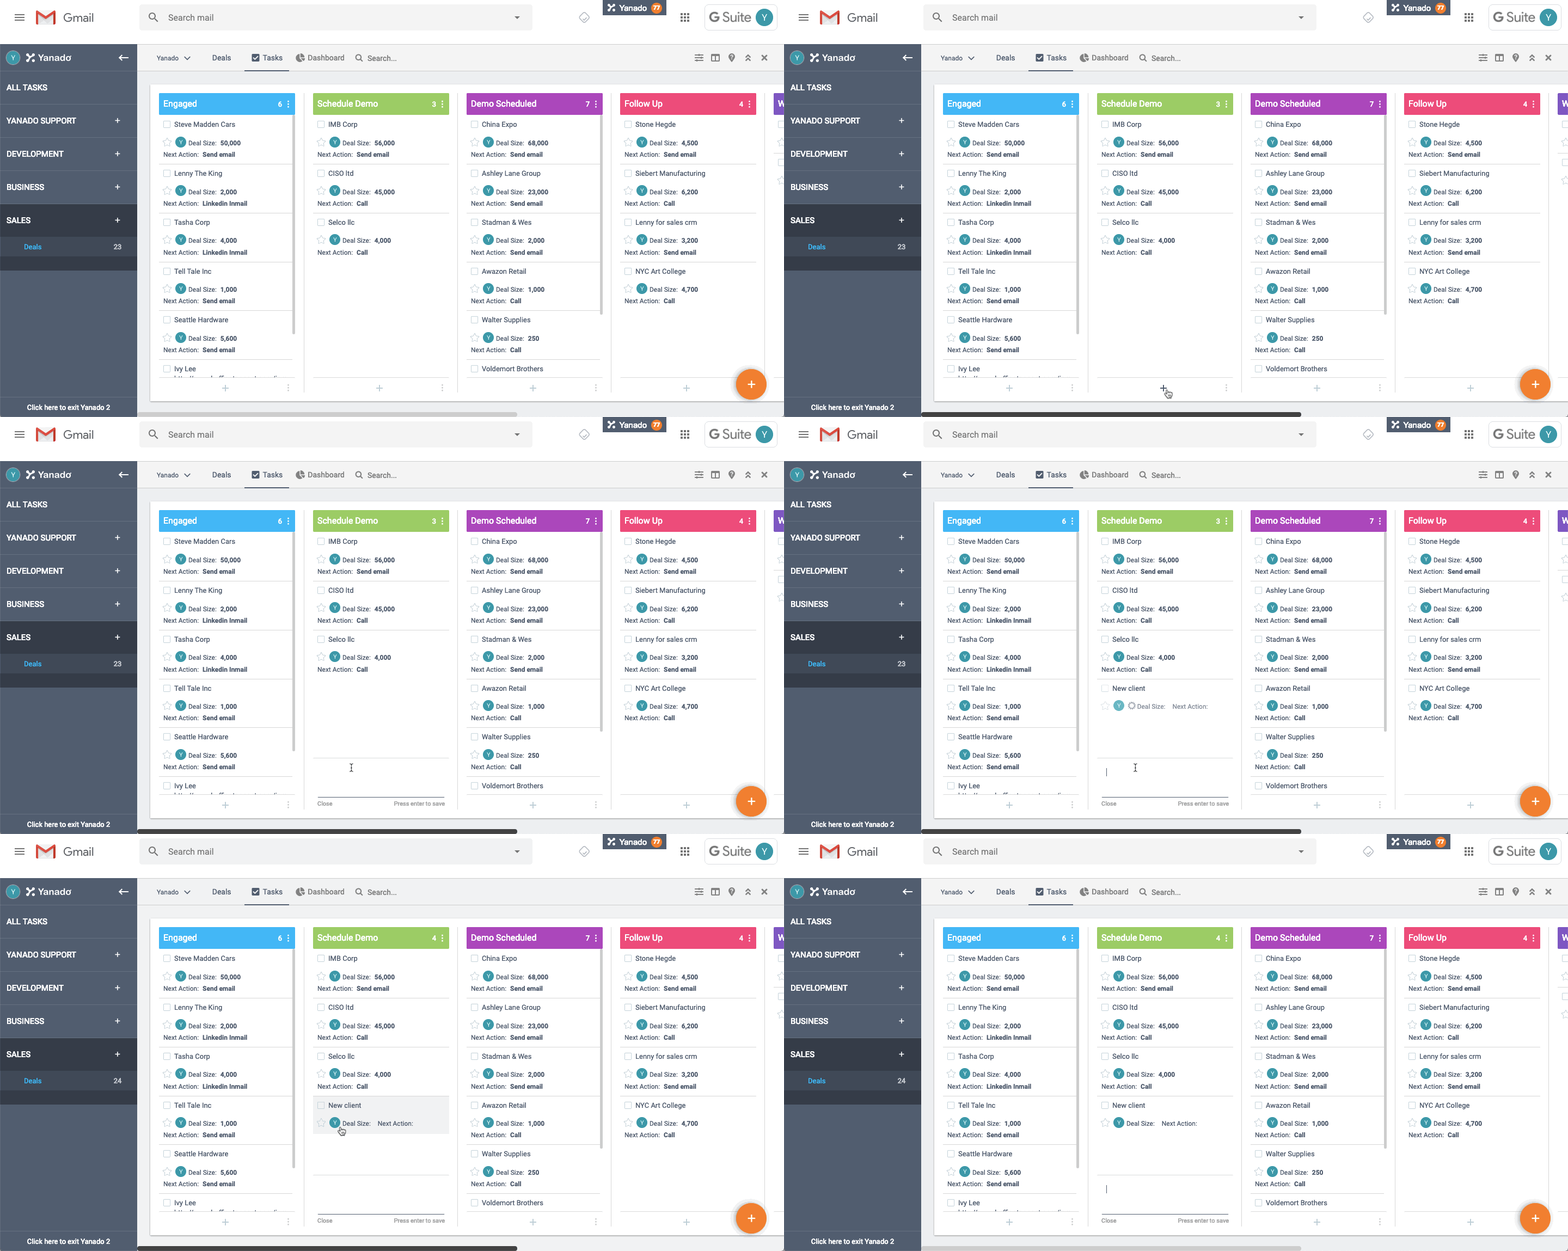
- Material & Kanban view – pick a list you want your task in, click the grey plus icon at the bottom of any column, type task title and press enter to save it.
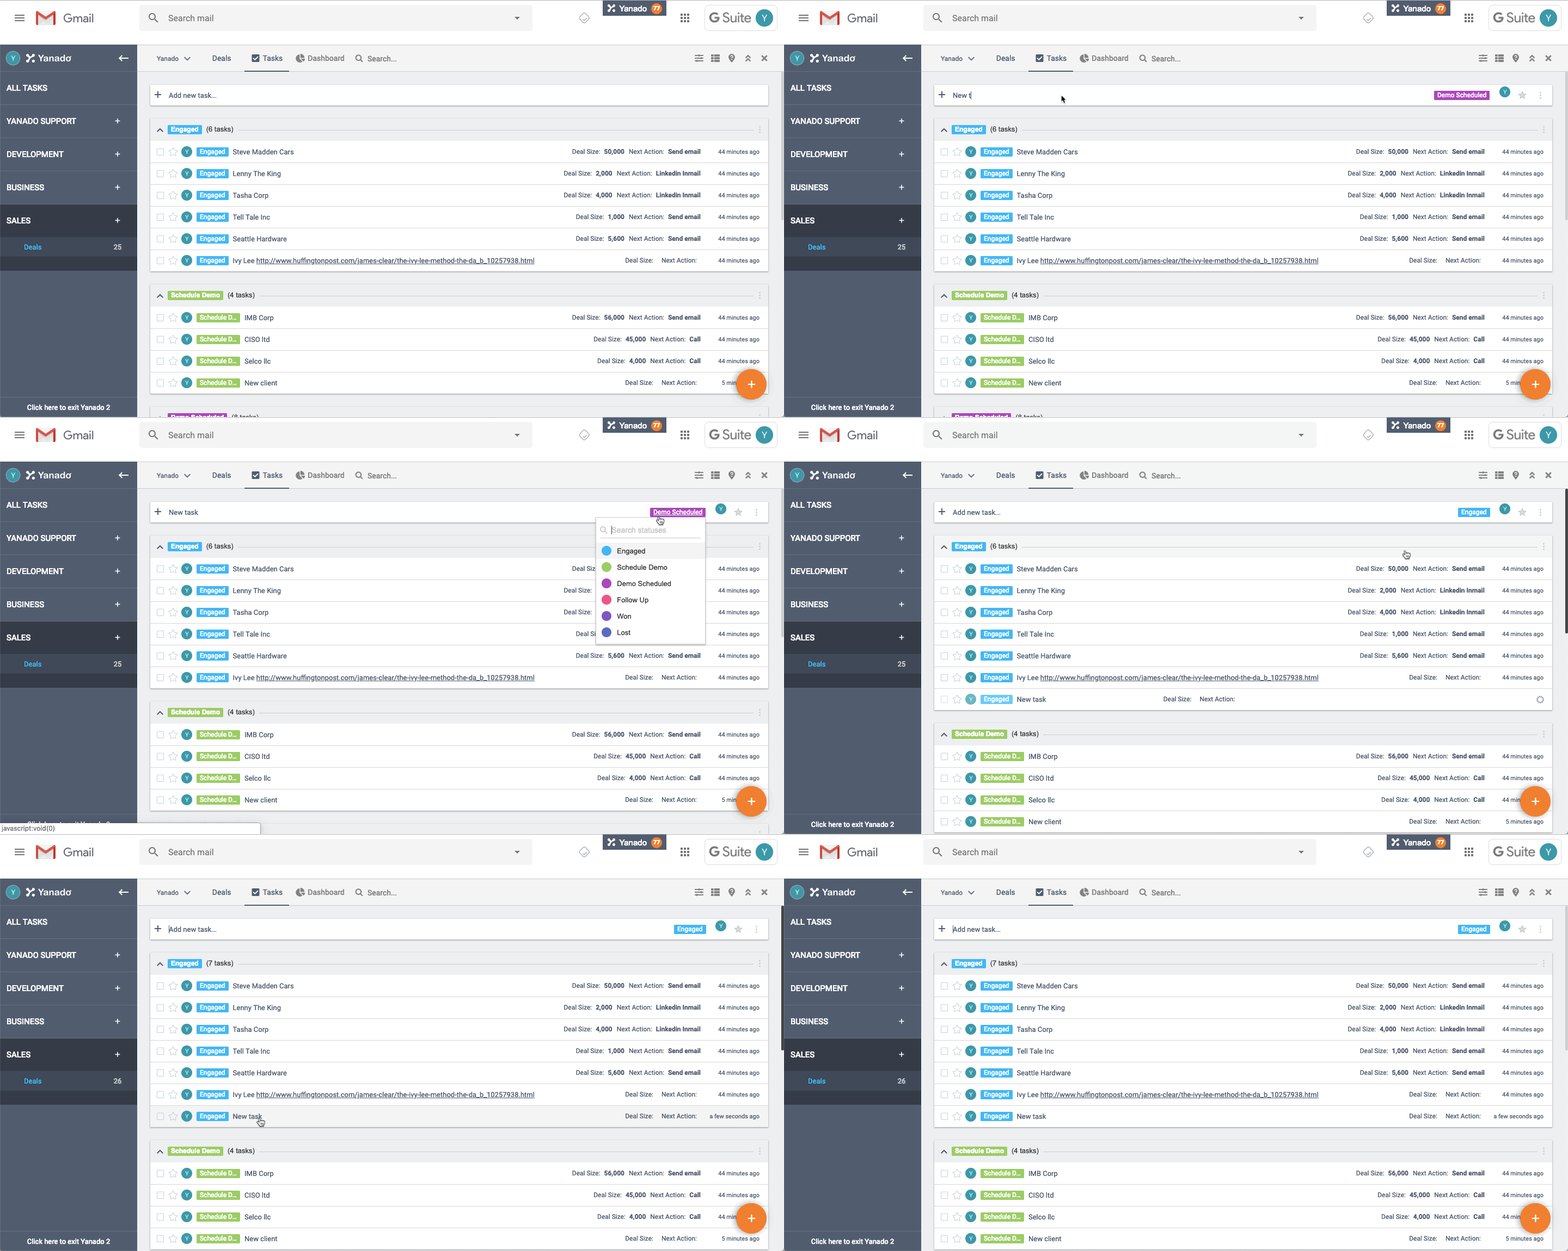
- List view – Type task title in the add task field on the top of the page, set properties such as status and press enter to save it.
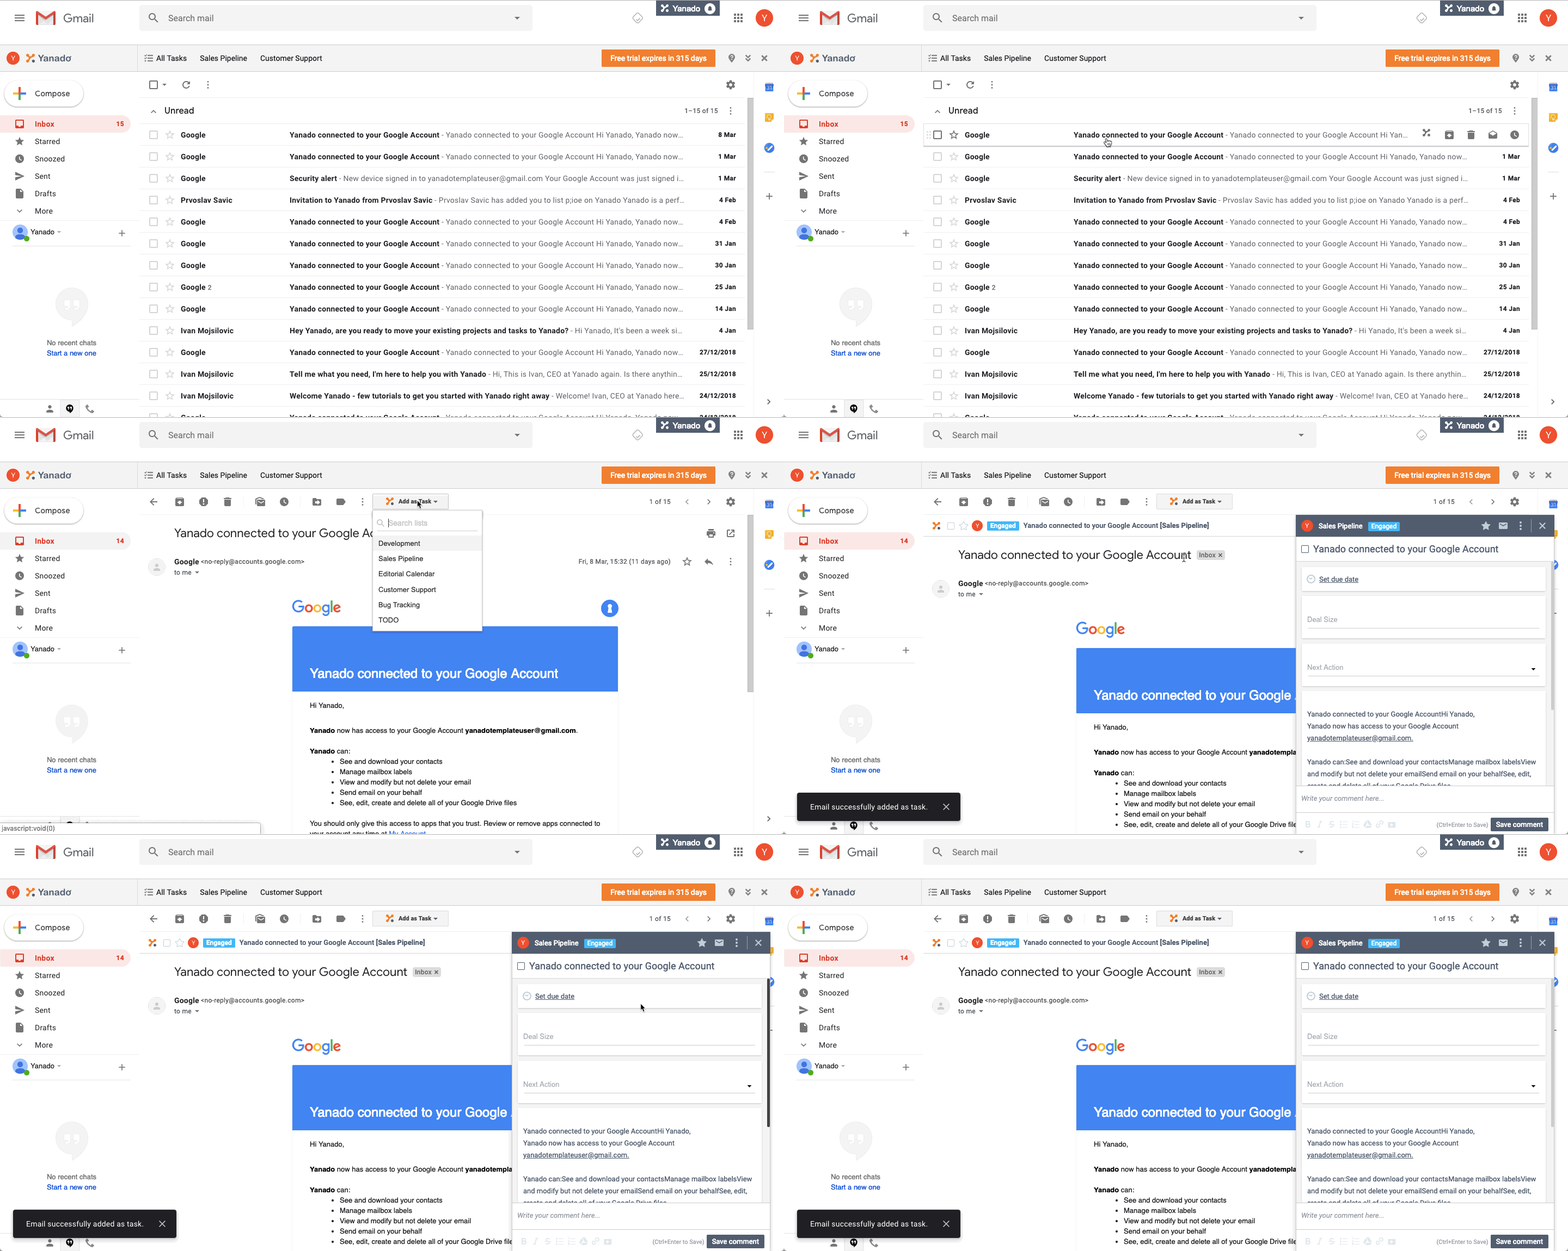
- Add email task – Select or open any email you want to create task from, click on the Add as task button. Select a list in which you want to save it and task will be saved.
Each list can have as many tasks included as needed. No limits. Also, editing, renaming or deleting a task is always a possibility. Furthermore, there are some other task options like:
- sharing a task with other users,
- assigning a task to your workers,
- making comments about the task,
- attaching files and pictures in the task,
- make it recurring,
- add subtasks and checklists,
- add due date,
- add custom fields,
- subscribing yourself to a task and
- archiving a task – once you’re finished with a task and you check it off.
4. Let Yanado Remind You of Important Tasks
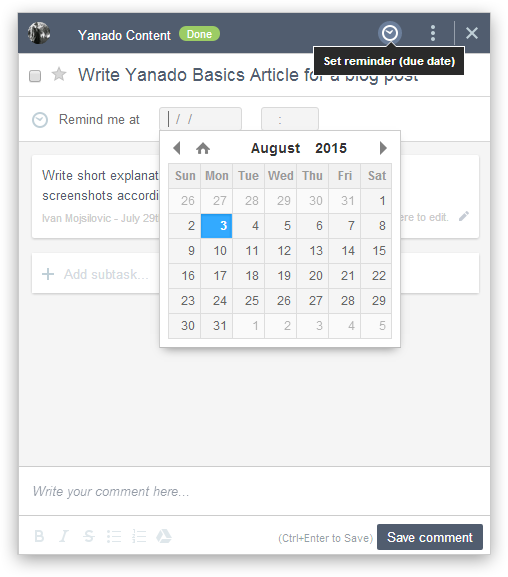
Don’t you hate forgetting meetings, birthdays or deadlines? Well, we thought about that and now, every task has a reminder button on it. Open a task you want to be reminded of, click the clock icon in the upper right corner and set the date and time. To reset the date and time or to turn the reminder off, simply click the clock icon again.
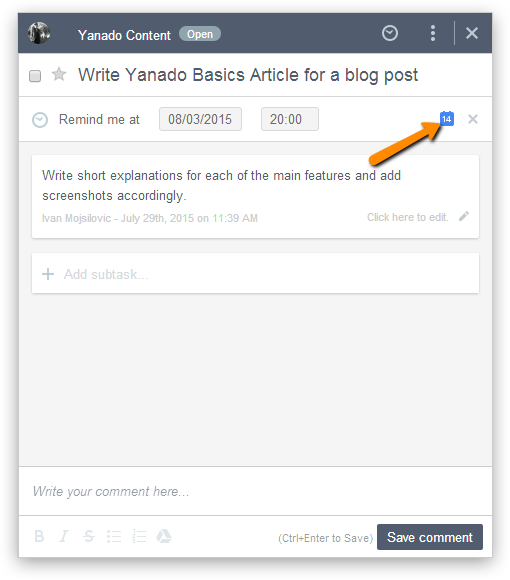
For more settings, click the calendar icon in the right corner and it will let you change the event details, event colors, notification settings and visibility.
Once you’ve done that, settings about the reminder will automatically be saved in your Google Calendar where you’ll be able to see it and you won’t forget a thing anymore.
5. Keep up With Your Progress Through
Task Statuses
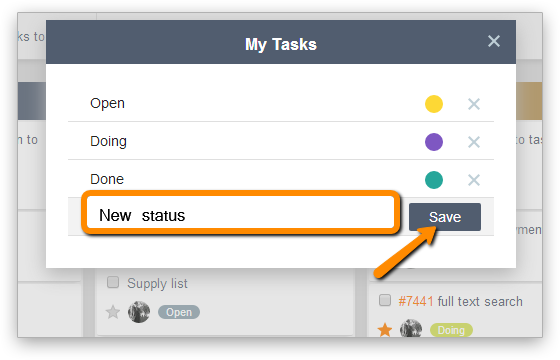
Status of the task, lets you see your own progress throughout the time. To do, doing and done can “do the work” but you can always add more of your own by clicking the settings icon next to the list name, in the left list bar. Name your status, pick a color for it and it is ready to be used.
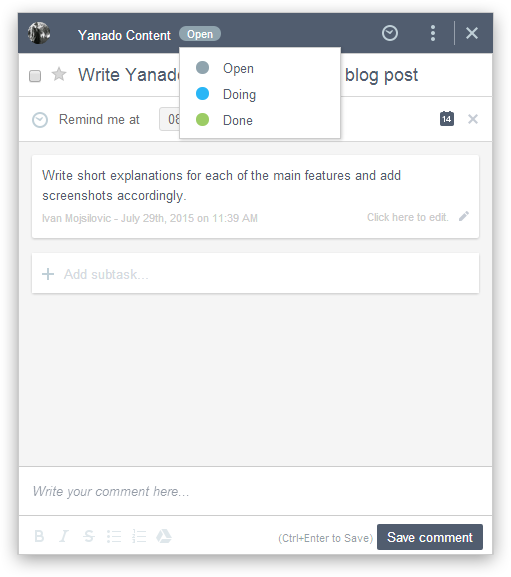
To change the status of a task, open a task, click the status and simply click on the new status of that task.
6. Use Tags to Group Similar Tasks
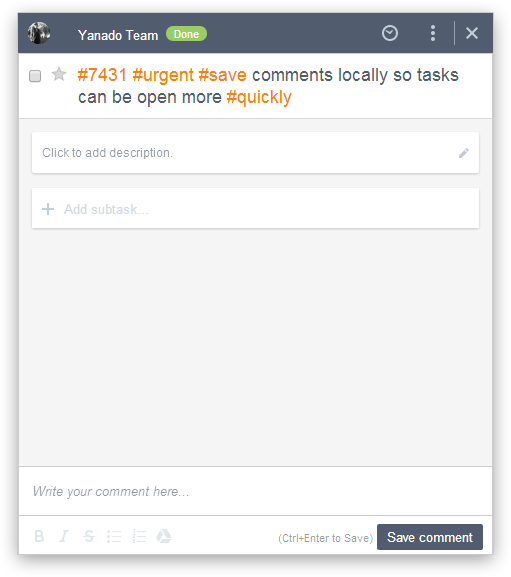
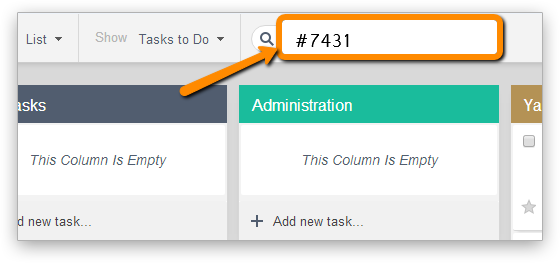
Just like on every other media or social network, tags are used for filtering information faster. Use hashtags in your comments, task descriptions, task or list names and make your search easier. Once you’re in a hurry, you’ll be glad you hash-tagged it!
Here’s a post about some tips on how to use tags in Yanado. Check it out.
7. Visualize Your Work by Using
Card or List View
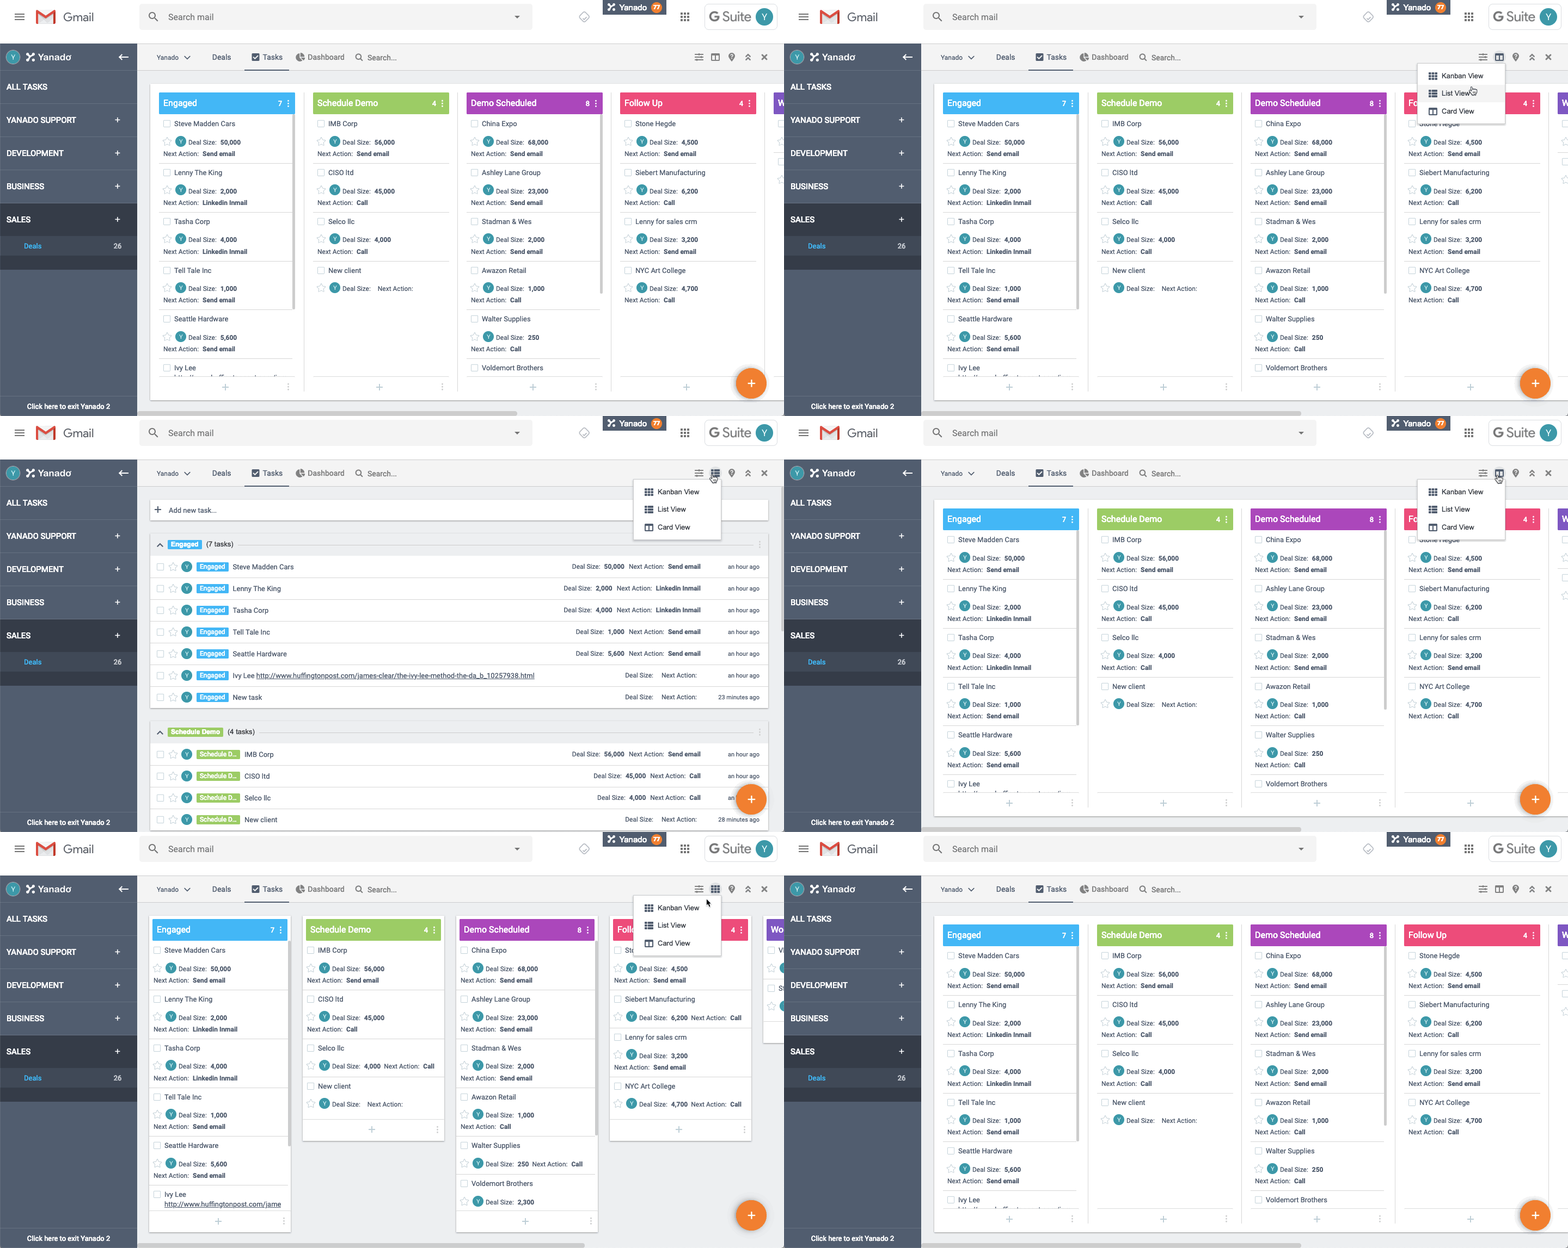
Some people like to see their tasks in a simple list and some like to visualize the progress by using a kanban view. Whichever type of the user you are, Yanado will work for you. You can easily switch between the list view and kanban (card) view.
Read next: Yanado Team Collaboration – Share Tasks and Collaborate Over Projects.

