This article is part of our How To Yanado series.
Yanado Settings are now enhanced with the Team page, to help easily manage all the Users and Lists from your team or company.
As a Yanado user you can be a regular user on the team, or you can be a Super Admin of your team.
(IMPORTANT: users who are upgraded as a company in Yanado, are also super admins who have the advantage of managing all the Lists and Users in the company – find more about this here).
When you are a regular user on the team in Yanado you will be able to use the Team Page in Yanado Settings for the following options:
View an overview of all the Users from your team. From here, you’ll be able to select a User who you want to add or remove from the Lists you are the Owner of.
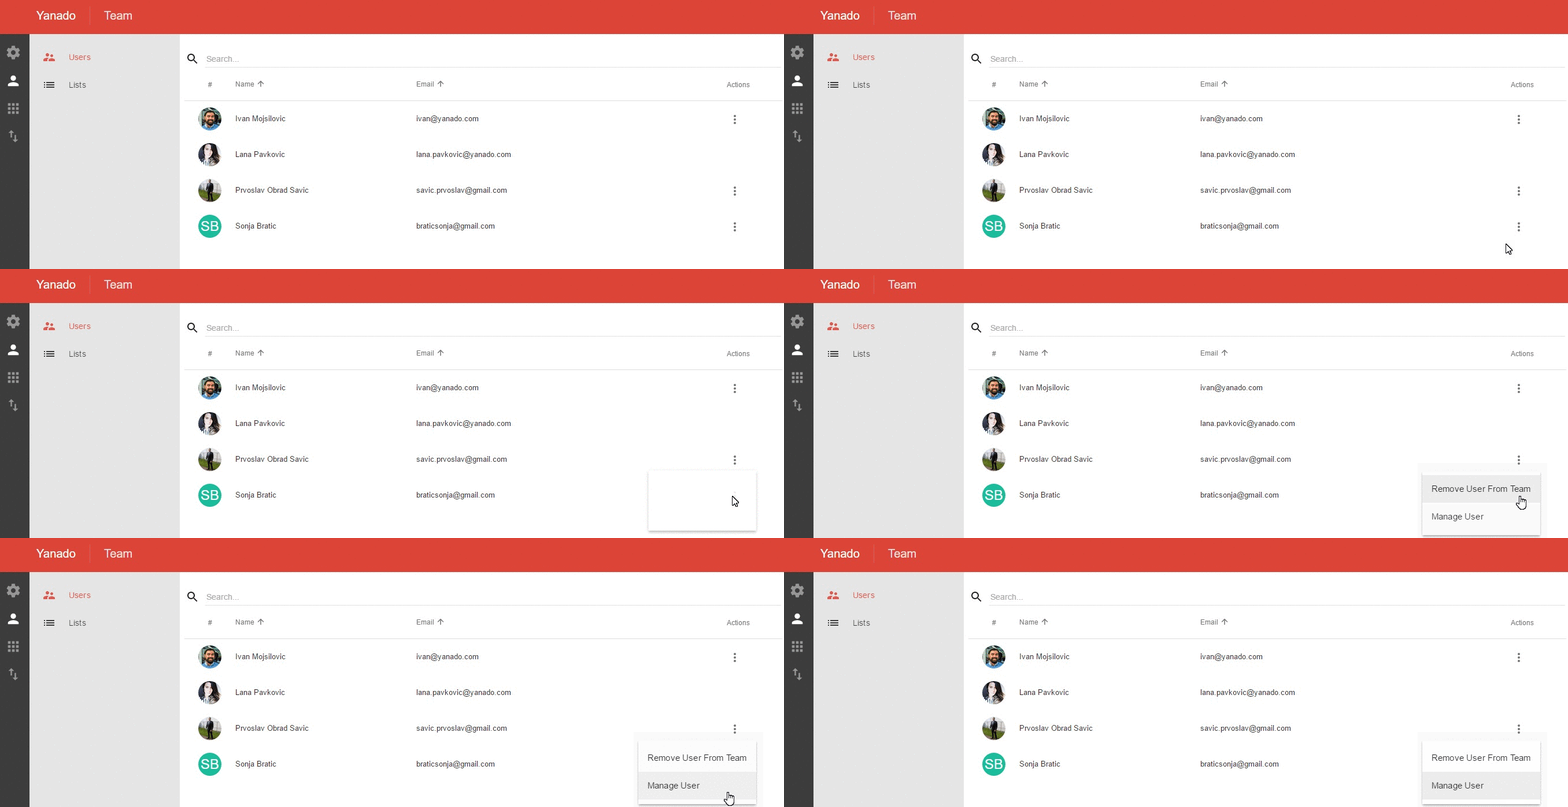
View an overview of all the Lists which you are the owner of. Here, you’ll be able to choose the List from which you want to add or remove the users at once.

When you’re a Super Admin of your team in Yanado, you will be able to use the Team Page in Yanado Settings for the following options:
- Add and remove multiple Users from the chosen List at once.
- Add and remove a chosen User from multiple Lists at once.
Super Admins can also manage the owners of all the Lists inside the company, which makes it possible to:
- Set the owners as the administrators of the multiple Lists
- Take over the ownership of the multiple Lists
- Assign the ownership of the Lists to another User in the Company
Adding Users from the Team Page
Adding new Users directly inside the Team Page can simply be done by entering their email addresses.
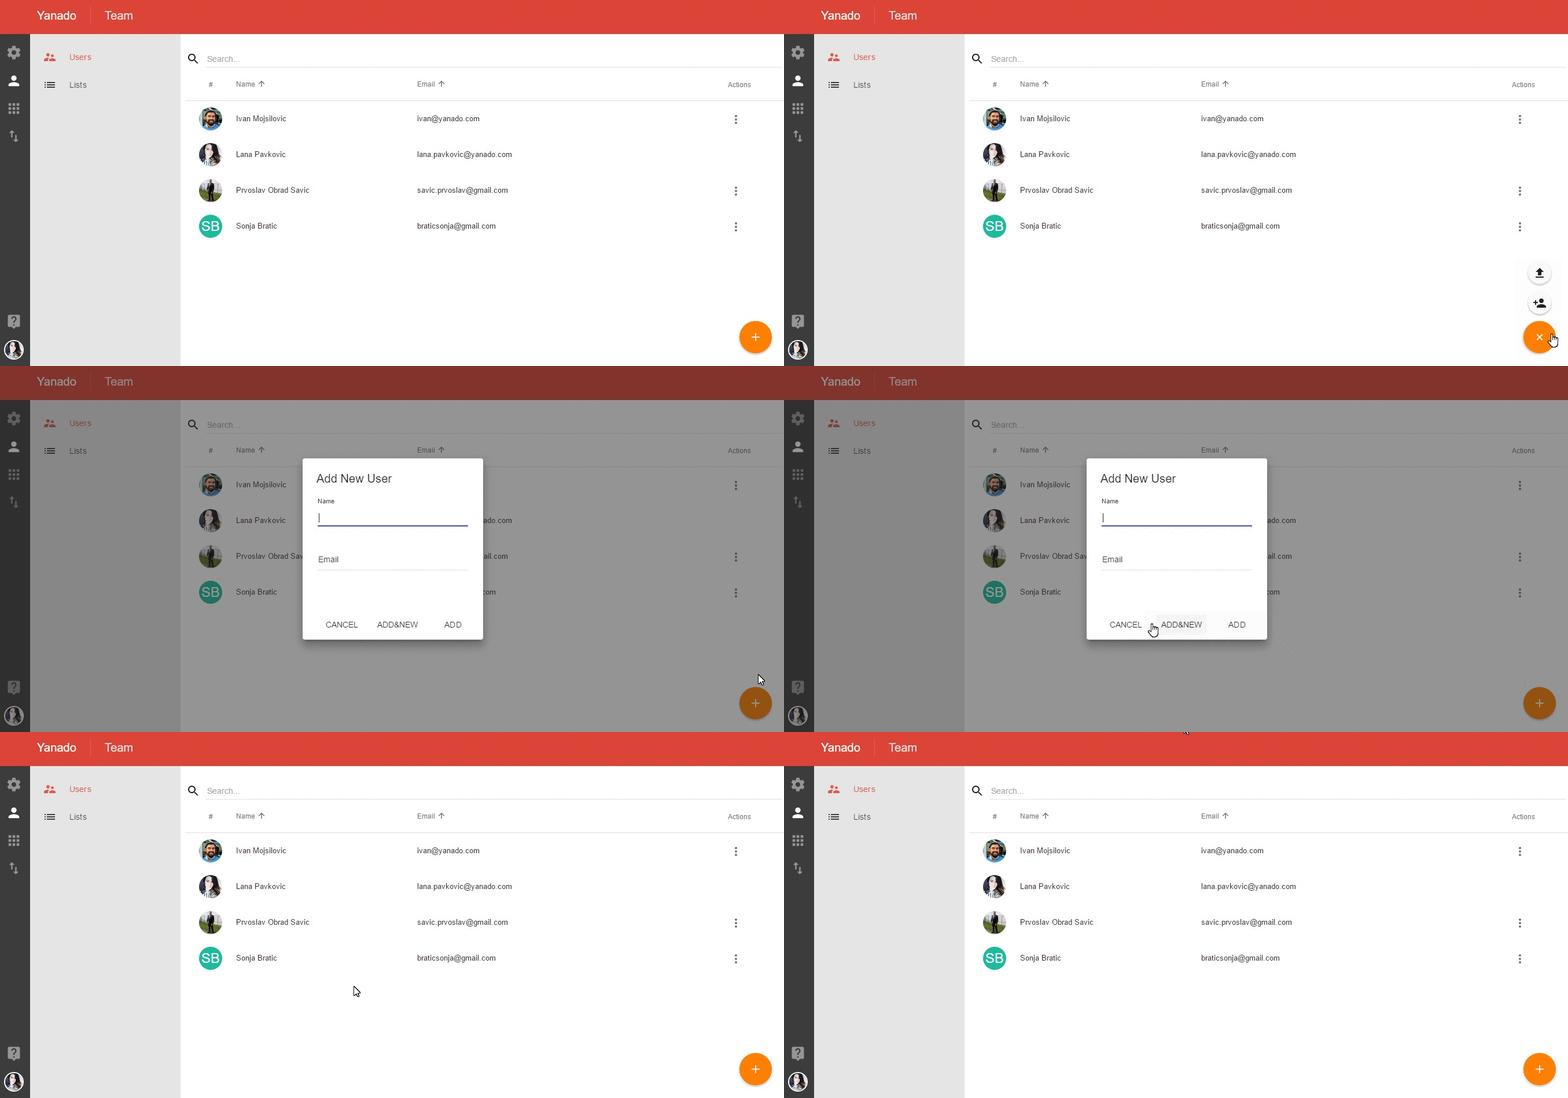
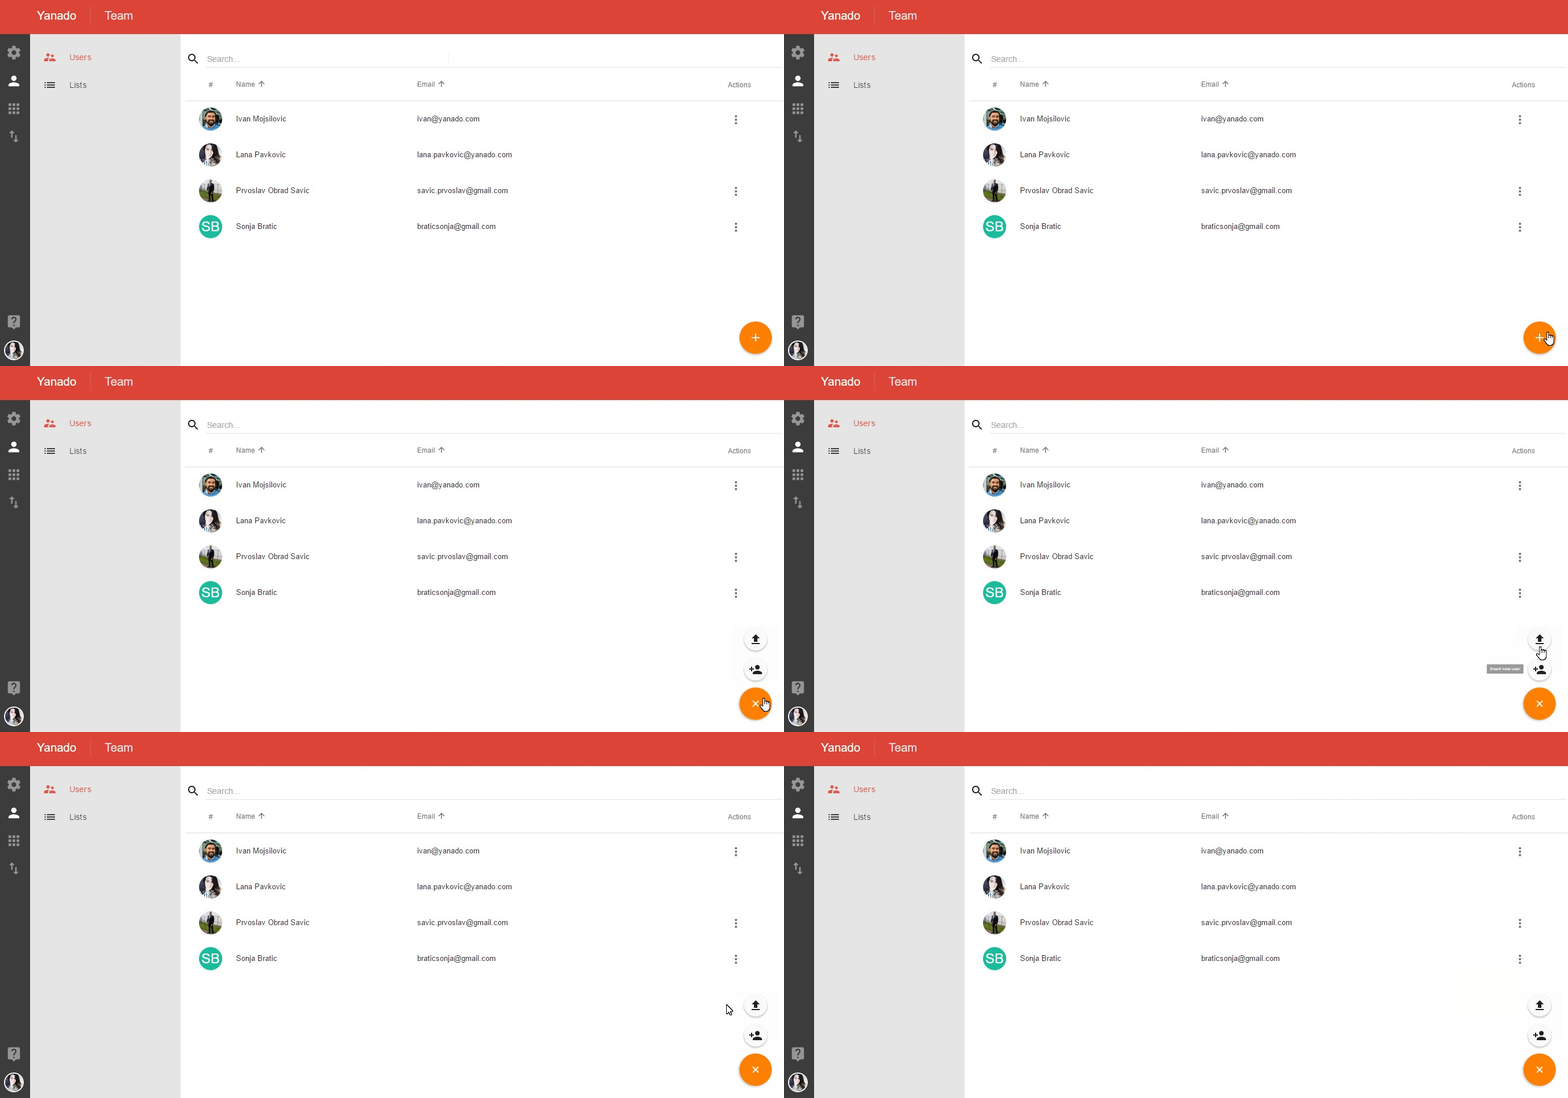
Another way is to import Users from the CSV file.
Removing Users from the Team in Yanado Team Page
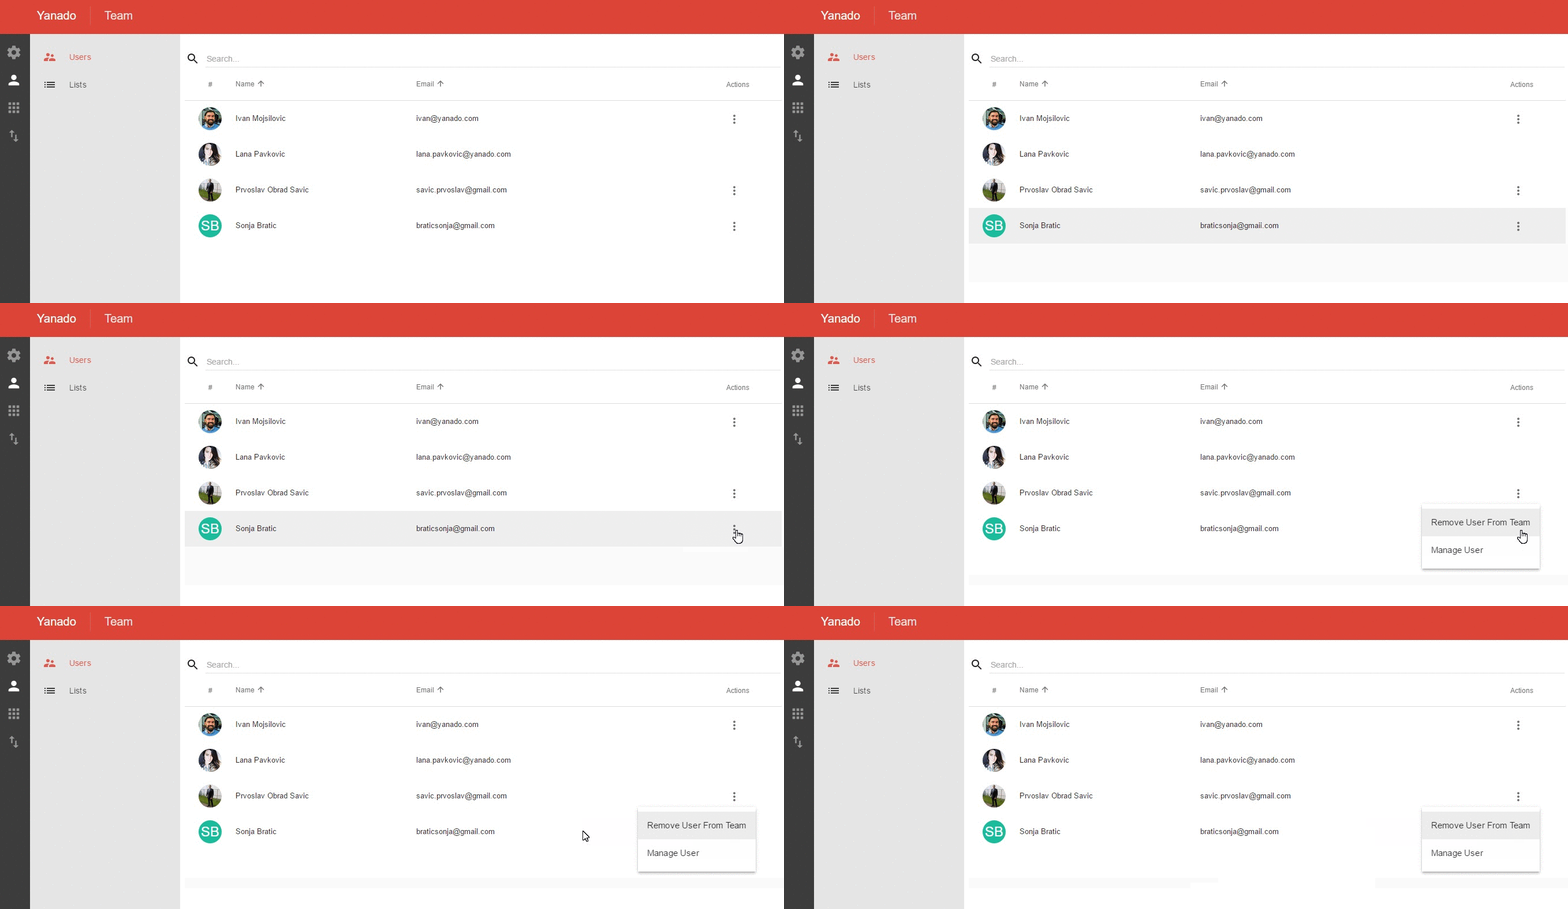
Removing users from the team directly from the Team Page in Yanado Settings is done simply as you open the Users Page. There you’ll be able to see all the current users on the team, and to remove a particular user, you’ll simply choose the user you want to remove, and then click on the “Remove User From Team” action.
Managing Users in Yanado Team Page
Adding and removing users
To add or remove a particular user from the List, you will go to the Users page inside the Team Page in Yanado settings. From there you’ll be able to choose a particular user on the team whom you can manage.
As you click on the “manage user” action, a window will open up from where you’ll be able to see which Lists the chosen user is currently a member of (right side), and which Lists a User is not the member of (left side), which are available for this User to be added in.
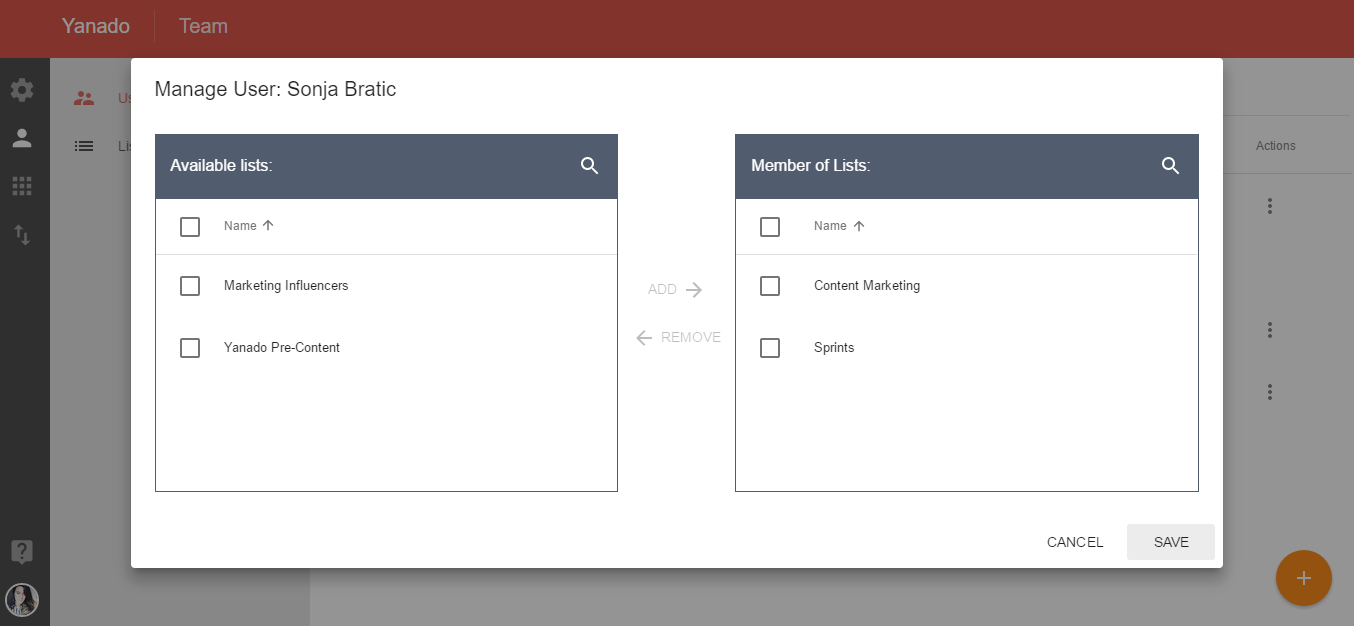
Adding a user in available Lists
To add a particular user on the List, you’ll simply select the Lists from the available Lists shown on the left side of the window and then click on the “ADD” option.
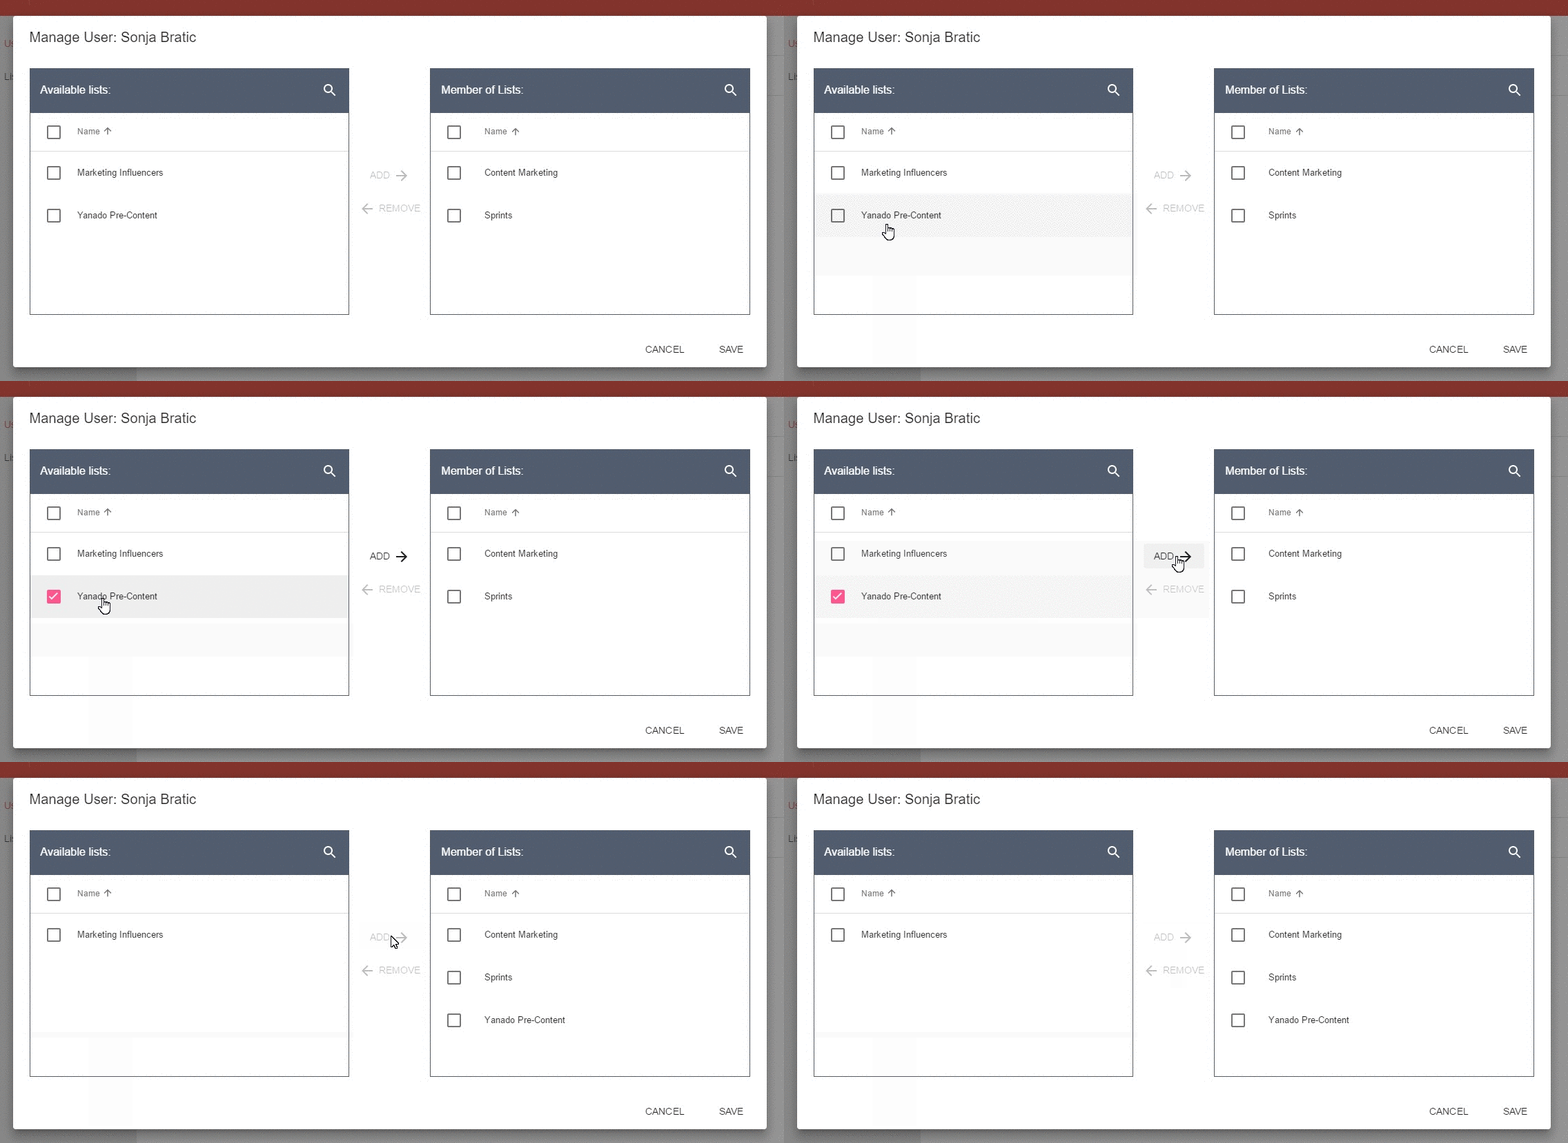
You can also select all the available Lists at once.
You do this as you click on the checkbox “Name” on the top of the available Lists.
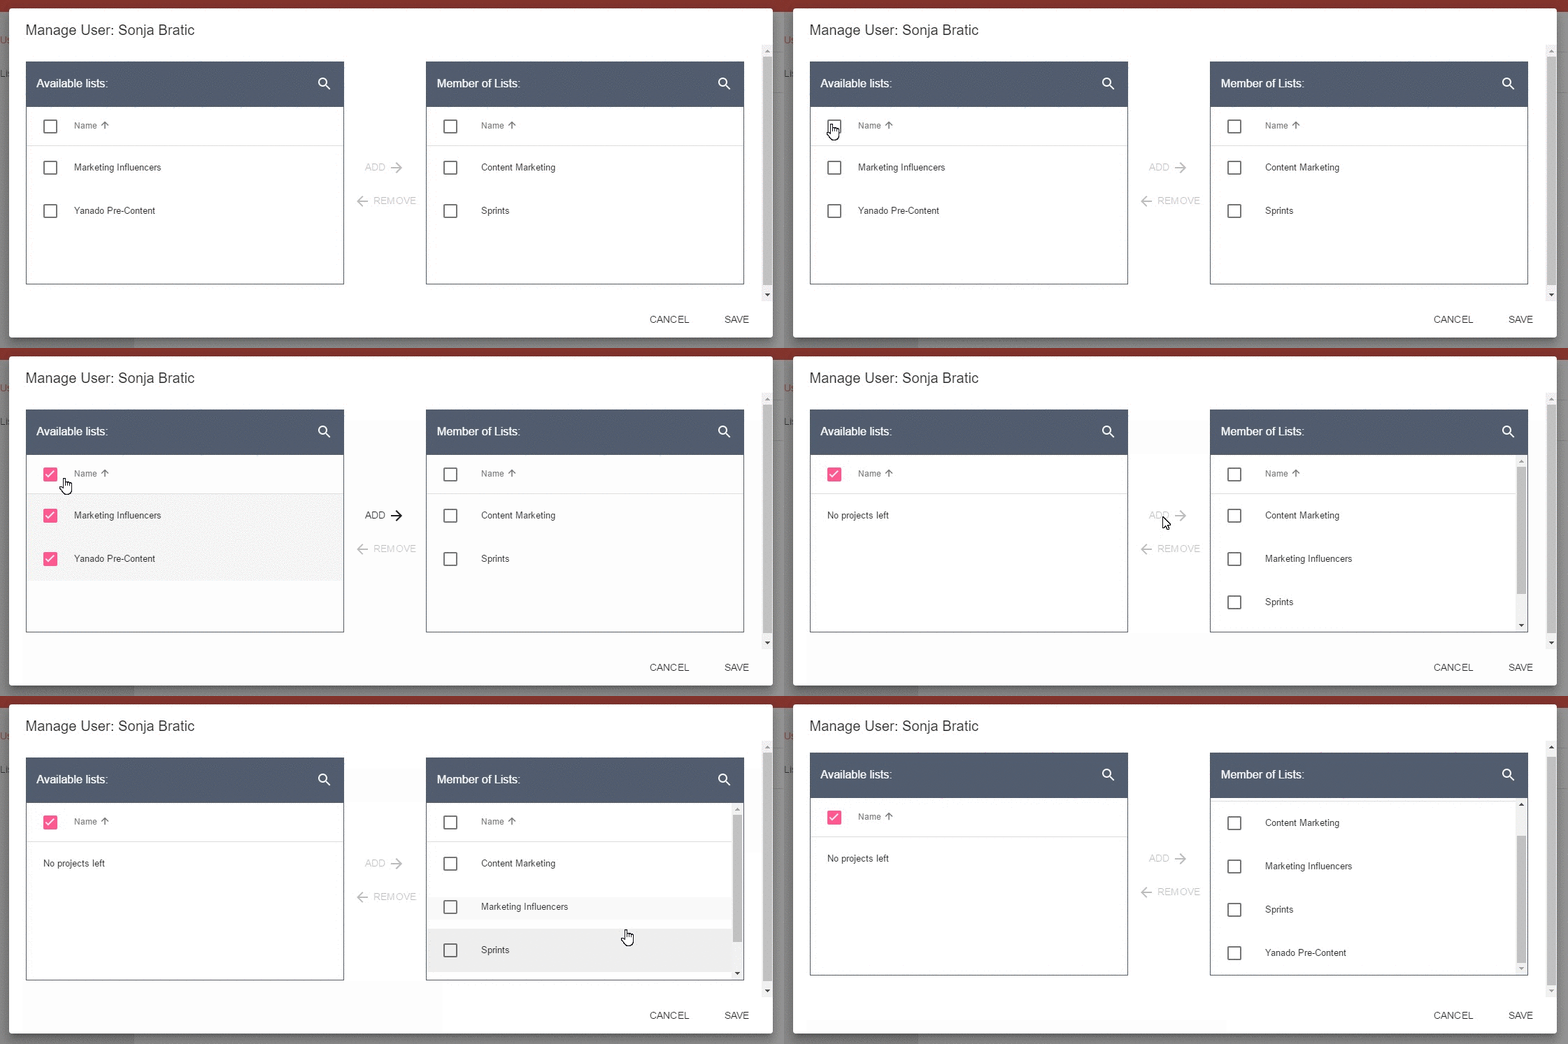
This action will add this User in all the available Lists at once.
Adding a user to the Lists you’ve selected will make him/her a member of that List. The selected Lists will then show up on the right side of the window together with the names of other Lists the user is currently a member of.
A User whom you’ve added to the List will automatically receive an email notification as an invitation to the List.
Removing a User from the Lists
To remove a chosen user from the List, you’ll simply select the List from the Lists this user is currently a member of, which are shown on the right side of the window, and then click on the “REMOVE” option.
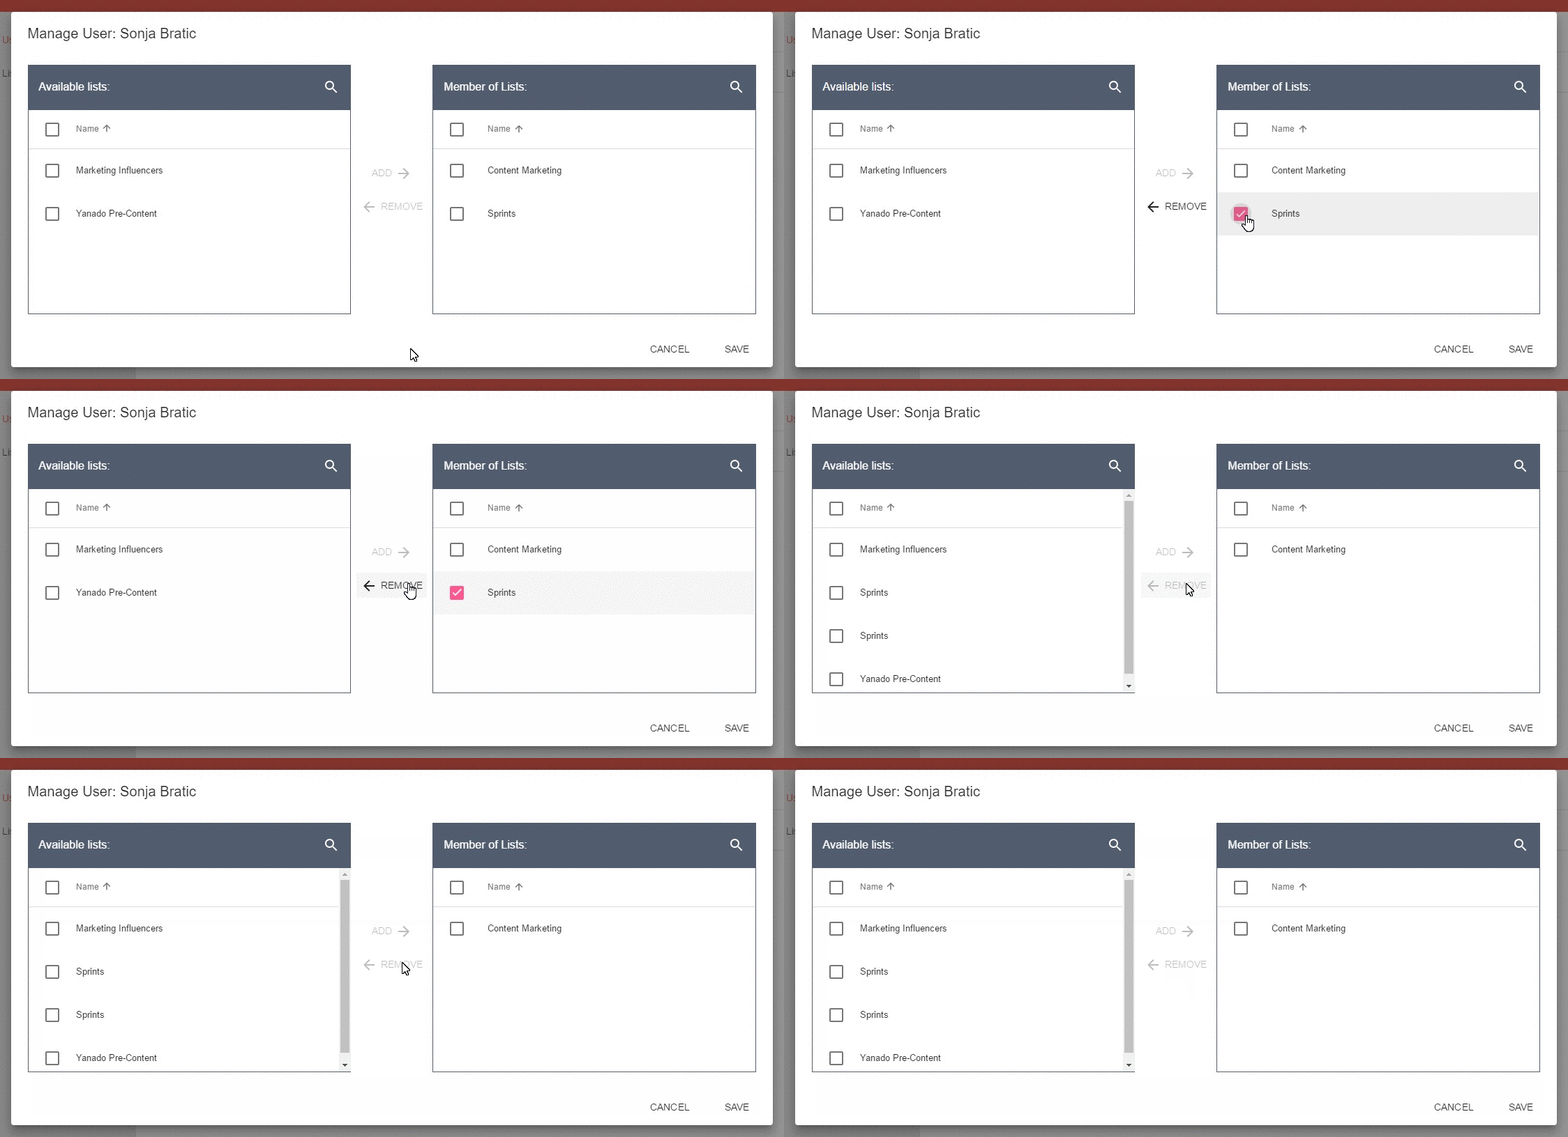
This action will remove this user from the Lists you’ve selected. The selected Lists will then show up on the left side of the window together with the names of other Lists a User is not the member of.
You can also select all the Lists a User is currently a member of at once,
You do this as you click on the checkbox “Name” on the top of the Lists a user is currently a member of.
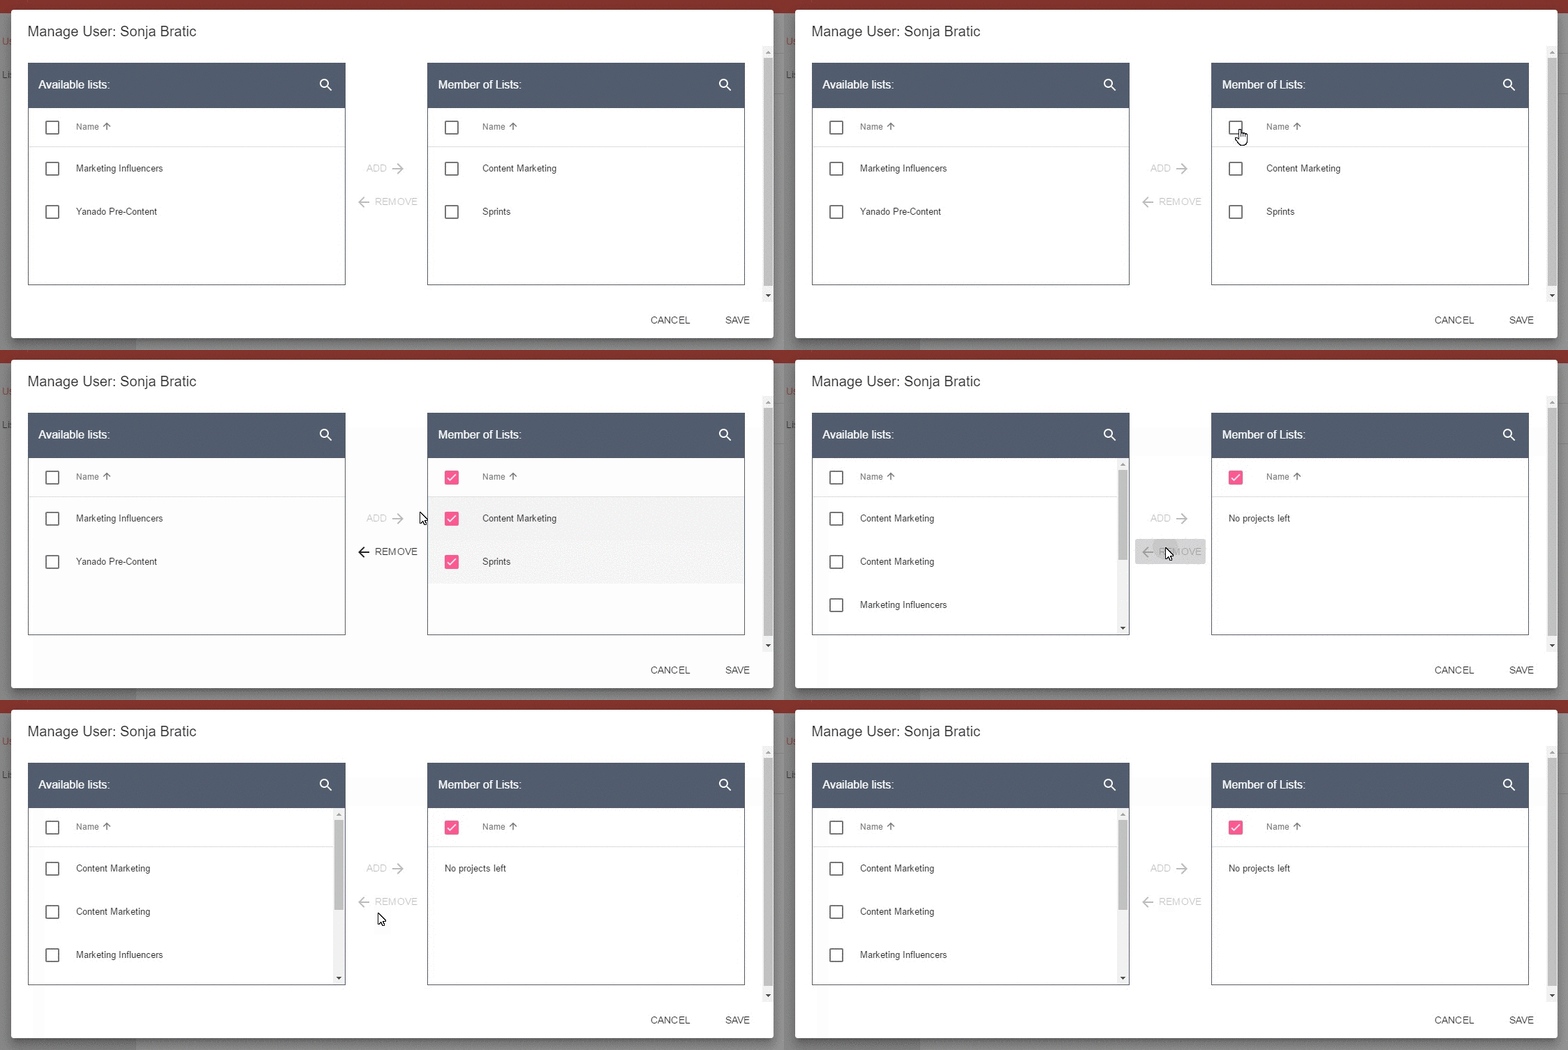
This action will remove this User from all those Lists at once.
Managing Lists in Yanado Team Page
As mentioned above, once you open the Lists Page in Team Page settings, you be able to see all the Lists you are the owner of. To be able to manage the Lists you are the owner of, you’ll have to choose a particular List and then click on some of the following actions.
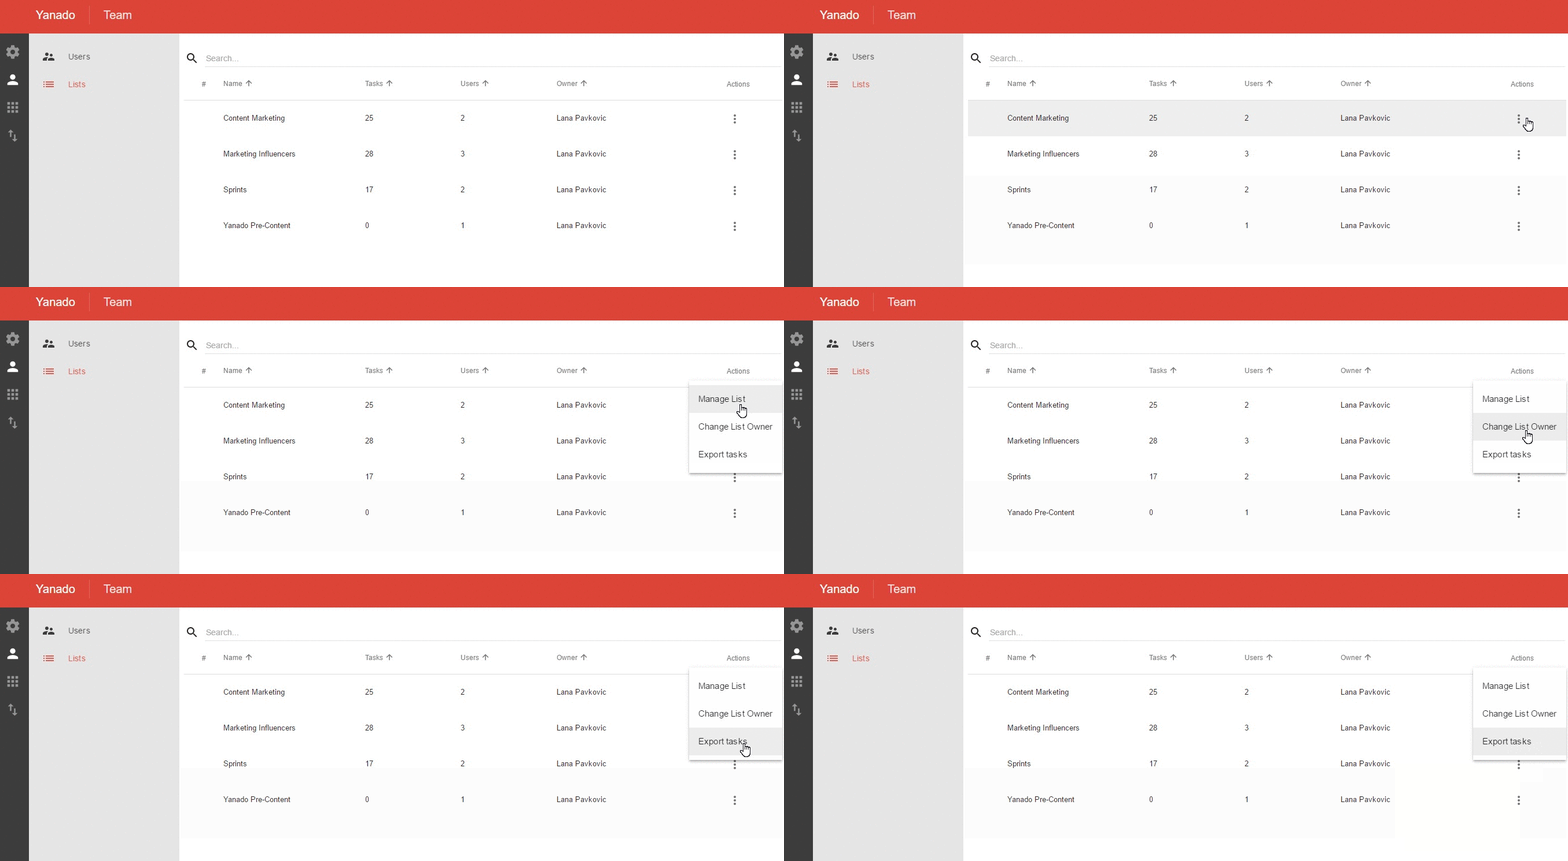
Manage List
The first action you can click on is “Manage List”, which will make it possible for you to manage users of this List.
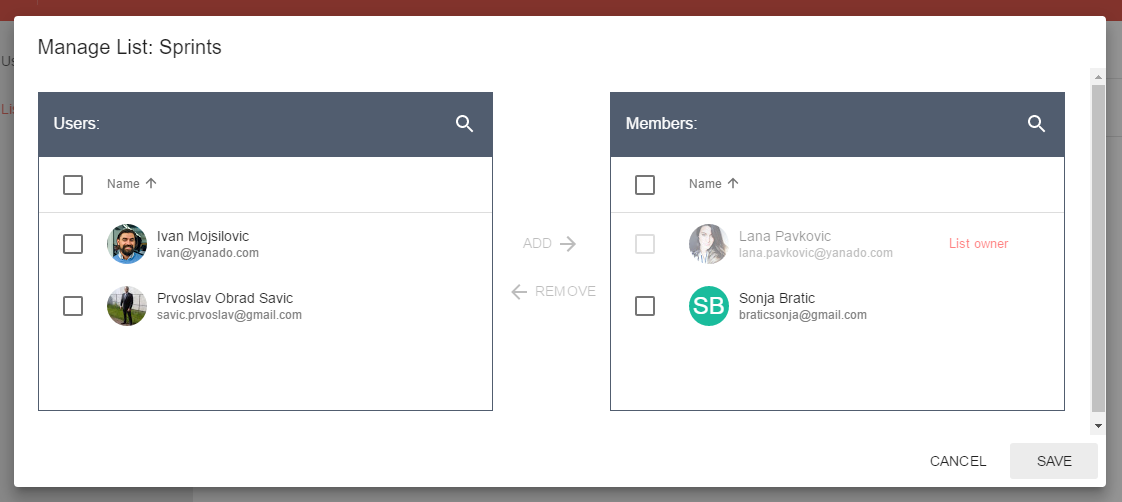
Once you click on this action, the window will show up, where you’ll have an overview of all the users who are currently members of the chosen List (on the right side) and of all the other users on the team, who currently are not members of this List (on the left side)
Adding users to the List
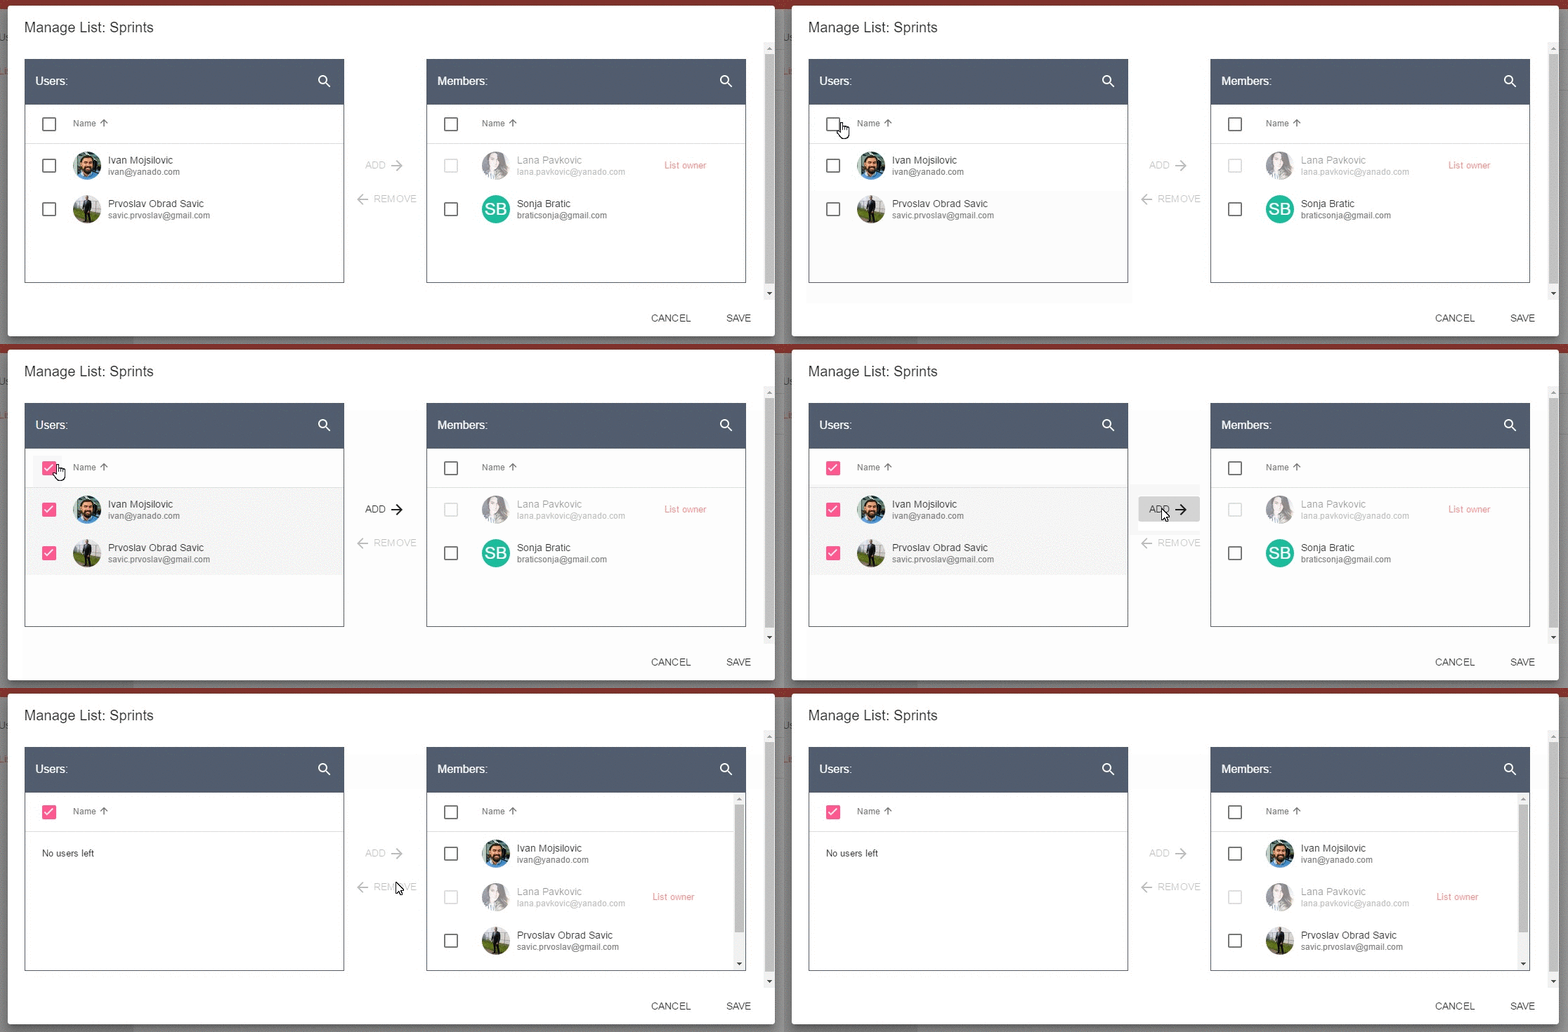
To add a user on the List, you’ll have to select a particular user from the users who currently are not members of this List (left side of the window) and then click on the “ADD”.
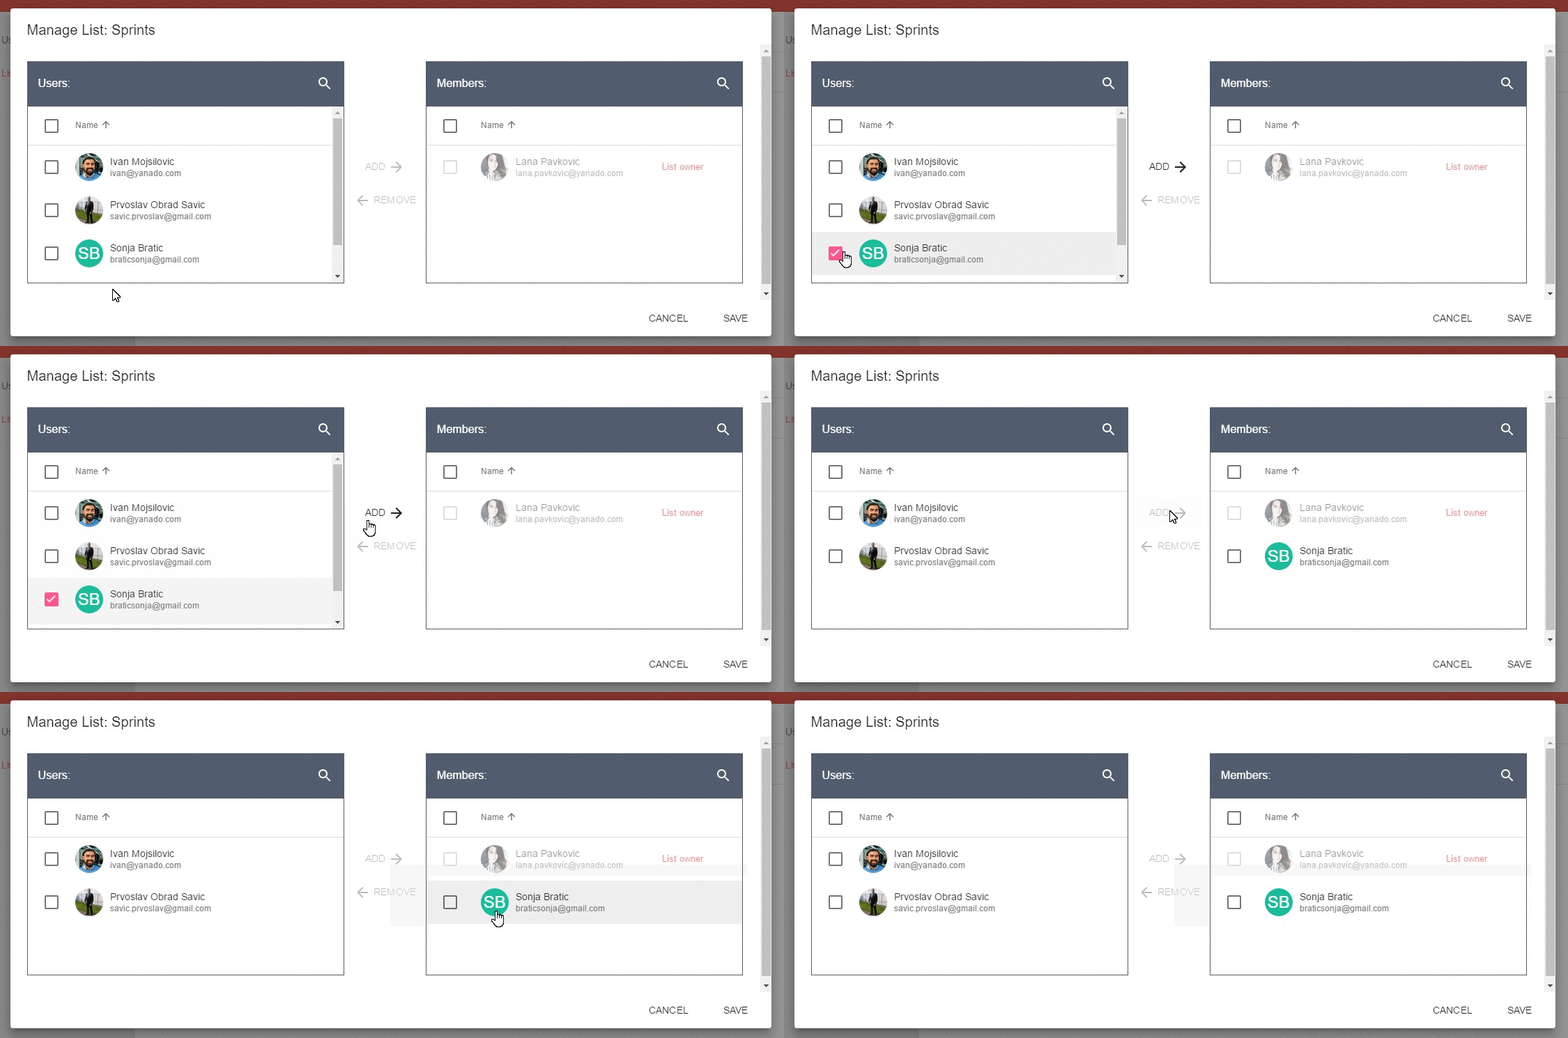
Or you can select all these users (from the left side) at once, by clicking on the checkbox “Name”, in order to add all these users on the List.
Removing users from the List
To remove a user from the List, you’ll have to select a particular user from the users who are currently members of this List (right side of the window), and then click on the “REMOVE”.
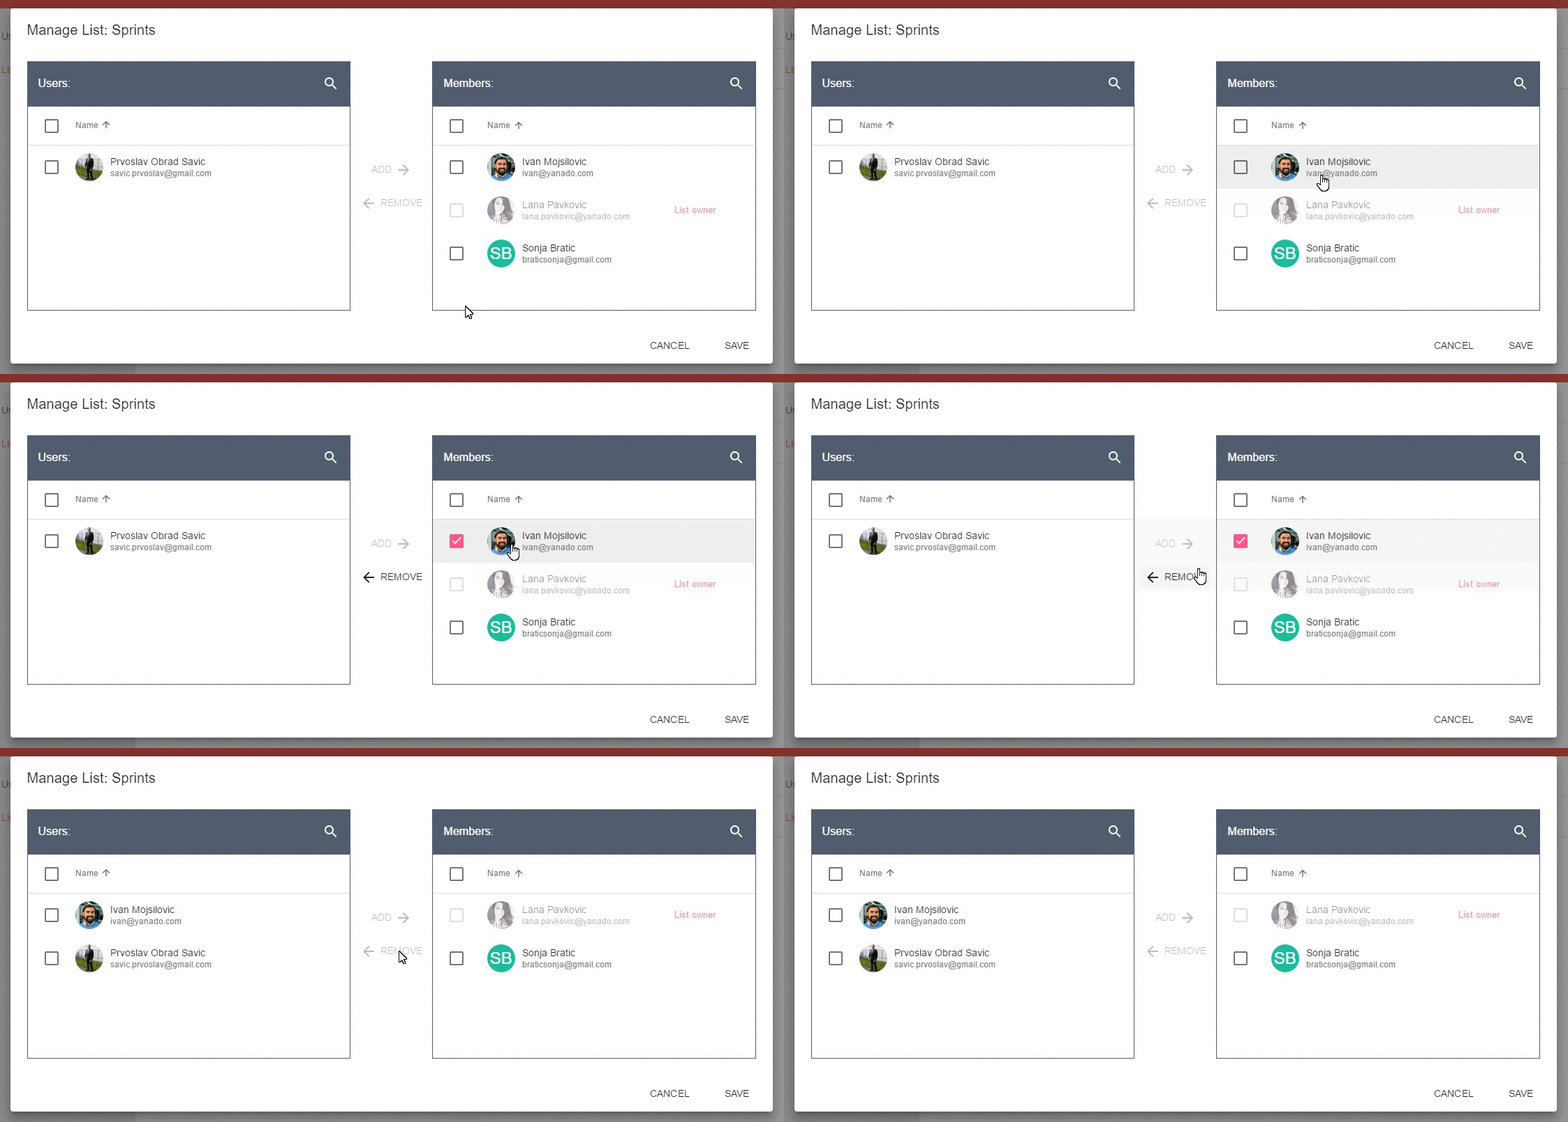
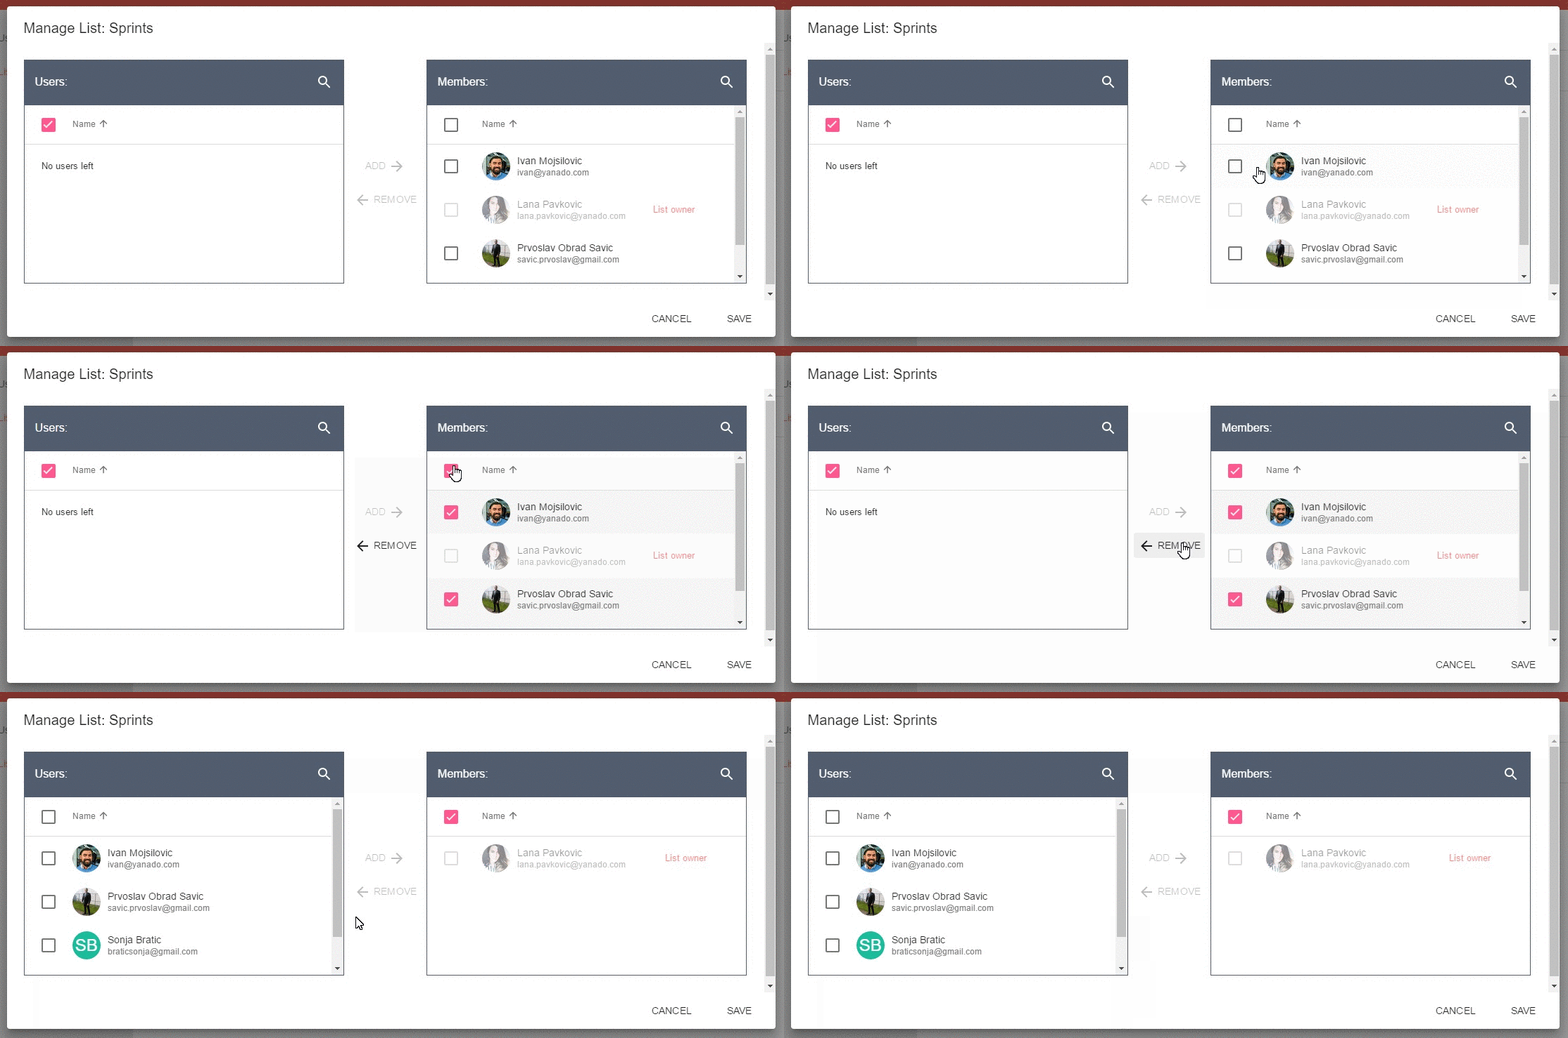
Or you can select all these users (from the right side) at once, by clicking on the checkbox “Name”, in order to remove all the current users from the List.
Changing List Owner
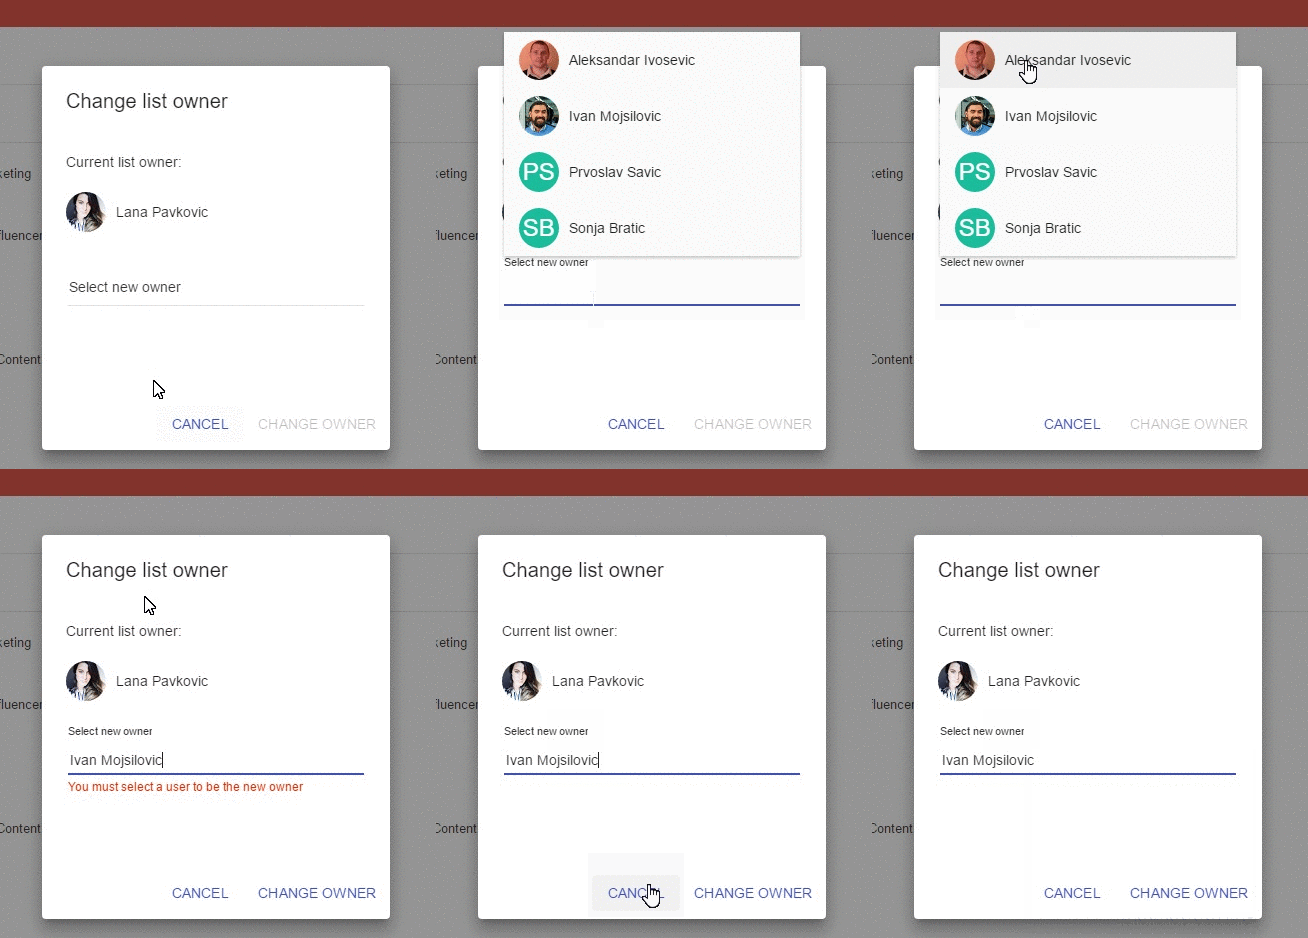
When you click on the action “Change List Owner” you be able to change the Owner of the selected List, which you’re currently the Owner of.
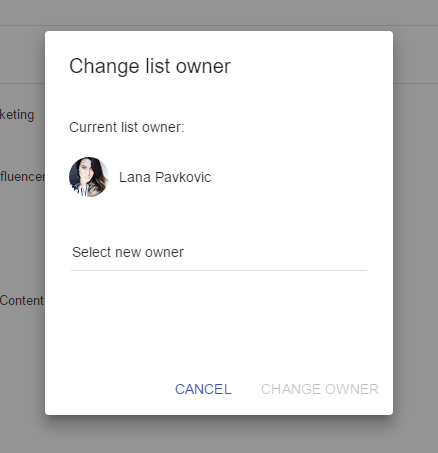
To change the owner of the chosen List, you’ll simply need to select a particular User from your Team, inside the window that shows up.
Exporting Tasks
To export the tasks from the chosen List you’ll have to click on the “Export Tasks” action.
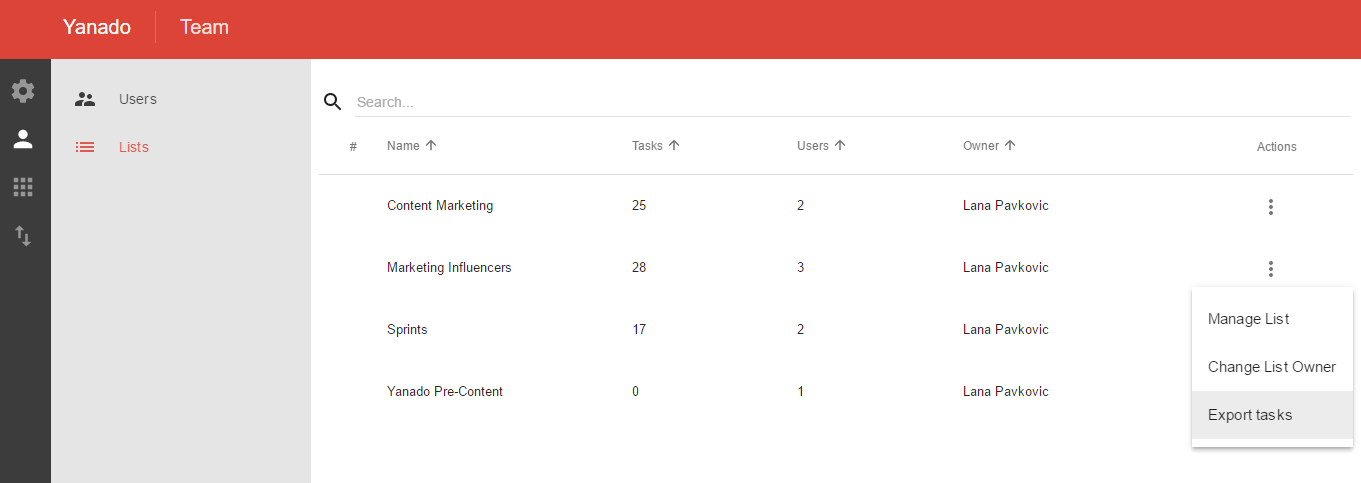
This action will export all the tasks from the List in a .csv file. You’ll have a .csv file downloaded automatically on your computer, where you’ll find all the tasks from the List, including the titles of the tasks, due dates, and assignees of each task, as well as descriptions (if any) of each task, and the status and the state of each task.

