This article is part of our How To Use Yanado series
In our Ultimate Guide to Scrum Project Management Framework, we tackled the essentials of Scrum as one of the most popular agile frameworks used by software development teams.
For Scrum to be performed successfully, you need a collaborative environment, where Scrum team members are actively communicating and reviewing their work against what they commit to accomplish during the iterations/sprints.
To make this possible, team members need to understand the big picture.
This means they must have a clear understanding of Sprint goals and the work required to achieve them.

If team members don’t understand how their work fits into the team as a whole, it stifles collaboration and cross communication, leaving no room for improvement.
For better teamwork, a collaboration space is needed. This is where a project management tool comes as a support. The simpler and easier to use, the better.
There are tons of project management tools out there to run your software projects using Scrum framework. And they all get the job done (more or less).
But a project management tool can quickly manage you. Sometimes, it can feel like you spend more time working the tool, instead of getting work done.
All you need is a simple way to visualize and track the work being done during the Sprints in order for team members to stay aligned.
“The effectiveness of any tool is the discipline [enterprise-wide] to use it well.” – Peter Saddington
So let’s see how to make this possible with Yanado.
Step #1 Setting Up A Collaborative Space for Better Teamwork
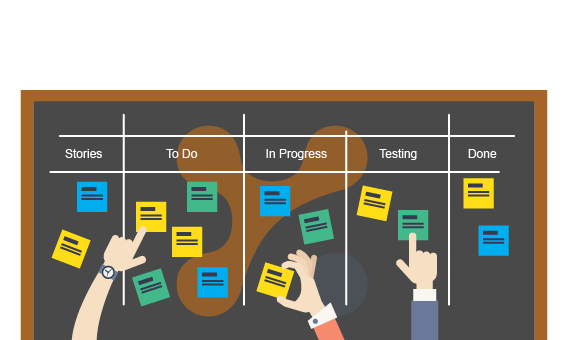
First, your Scrum process needs to be visualized and tracked in one place, accessible to everyone on the team.
To make one in Yanado, start with creating a separate List naming it Sprints, as an example.
Invite users to the List to put everyone on the Scrum team (Product Owner, Scrum Master, Development team).
Next, you need a well structured process to fit into the Scrum framework.
To do this in Yanado, we suggest you create the following Statuses inside the Sprints List:
- Product Backlog – list of items representing all product features that will be prioritized, estimated and planned for upcoming sprints.
- Sprint Backlog – list of items team will work on in the next sprint based on the priority.
- In Progress – list of items team is currently working on in the sprint.
- Dev Completed – list of items developers are finished with but are still being collected and prepared for testing.
- Ready for Test – list of items that are ready for testing.
- Test In Progress – list of items that are being tested.
- Done – list of items that are fully completed during the sprint.

Step #2 Managing The Product Backlog
Status: Product Backlog
This is where you start. A separate column status in Yanado for your Product Backlog makes it possible for your Scrum team to have a place to put items it will be working on in the upcoming sprints.
Your Product Owner is responsible for the Product Backlog, as he will be re-prioritizing the items inside of it based on the strategic and the tactical decisions.
To learn how Product Owner can do that, check out Roman Pichler’s advice on the relation between The Product Roadmap and the Product Backlog
Essentially the Product Backlog should serve as the connection between the Product Owner and the Development team.
Now, what goes into the Product Backlog column?
Simply: all work items should be included here. This is important because it ensures everyone’s work items are included in the overall discussion for each sprint. Team members can then make trade-offs with the product owner before starting a sprint to be clear with everything to be done. It helps to know these items are all of a particular type.
Here are some of them:
- Product features
- Bugs
- Technical work
- Customer requests
- Action items from the retrospective, etc.
- Miscellaneous tasks that enable the team to perform the other work.
To better understand the types of Product Backlog items, check out how Ken Rubin describes the concepts behind them.
To start creating these items in Yanado, go to the column Product Backlog and Add a new Task, writing it’s title in the form of a User Story.
To pick some good advice on how to write your tasks as User Stories, read our article. And if this doesn’t help, you might also want to check out these 10 Tips for Writing Good User Stories, by Roman Pichler.

To emphasize the type of the Items, use Tags as you write the title (for example: #feature, #bug, #improvement, #technical work…).

As a Product Owner you will be prioritizing the Product Backlog items.
In Yanado, the priority is determined by the order of the items in the column. To move or change the priority drag the items up or down.

Items shown at the top of the column are most important, and the team should start work on those first. Items at the bottom are to be tackled in future sprints. These items may be more vague, while items near the top should be the most defined for your team to easily implement.
Prioritizing the Product Backlog properly means the Product Owner will seek the inputs and feedback from customers and the development team to optimize everyone’s workload and the product delivery.
At this point, the most important input the development team needs to provide is a high-level initial estimate, in order to get an idea of the effort required for Product Backlog items.
This helps to inform a Product Owner’s decision about priorities.
To include the estimates in your Product Backlog items in Yanado, simply write them next to the items title.

With these rough estimates, a Product Owner will be able to take another quick look at priorities and change the order of items.
The Product Backlog also serves as the foundation for sprint planning, as the highest priority items are the ones that the team will deliver in next sprint.
To be able to start work, make sure you provide enough detail to each item.
These details are commonly called the Acceptance Criteria. This is what helps the team to have a common understanding of what completes a particular Item.
To write these acceptance criteria in Yanado, you simply open the items from the top of the Product Backlog column and Add Task Description. You can also turn this details/acceptance criteria in a checklist and use it later during the testing.

Take note the Product Owner should regularly maintain the Product Backlog column, reviewing it before each sprint planning meeting to ensure new priorities are assessed and inputs from the last sprint are also incorporated. This is the part of the product backlog grooming, which also includes adding new items and discarding irrelevant tasks.
For items you want to remove, use the Archive or Delete option.
So it’s important that Product Owner gets the Product Backlog items in shape before the team starts working on them. To learn more about how to do that, check out Roman Pichler’s five-step backlog grooming process.
Having top priority items in the Product Backlog column drawn up, detailed and estimated is what makes you ready for the next step – sprint planning.
Step #3 Sprint Planning
Statuses: Product Backlog, Sprint Backlog
When in the sprint planning meeting, the whole team with Product Owner is looking at the top items from the Product Backlog column in order to decide what would be possible to deliver in the next sprint.
To learn more about the sprint planning meeting, check out this article by Dan Tousignant.
The Product Owner presents each item and explains how it should work from a functional perspective. The whole team discusses the item in detail and asks questions about the item in order to establish what it should do and how it should work.
Eventually, the development team will decide how much they are able to achieve in the next sprint as they pick a section of items from the top of the Product Backlog column.
As the Items are picked from the Product Backlog, make sure you drag them into Sprint Backlog column.

At this point the team will be focused on planning the work associated with items they have decided to deliver in the next sprint.
This is where you Assign each item to a particular team member.
NOTE: We suggest one team member is responsible for each item so you can have a clear understanding of individual responsibilities. This is possible if you break the item making it small and specific enough so that one person on the team can take the responsibility to implement it.

Team members will likely want to split items up into constituent subtasks, representing small pieces of work required to be done for the items to be finished. In Yanado, simply open the items and add Subtasks.

Once you have all the items set in the Sprint Backlog column your team is ready for the next step – sprint!
Step #4 Tracking the Sprint
Statuses: In progress, Dev Completed, Ready for Test, Test In progress, Done
Once team members begin working on the items they are assigned to, they will drag them into the In Progress column.

While they work on the items, they will be using the Subtasks they created to easily guide themselves through the progress. Since these Subtasks in Yanado are in the form of a checklist, this makes a good visual indication of the amount of work associated with the item as it is completed.

For items developers are finished with, but decide to leave in one place before sending to testing, consider dragging them into the status column Dev Completed. It is good to have this status column because developers may decide to have more finished items to send for testing in a batch process, rather than losing time sending them one by one.

Once developers finish all their work on the items they will drag them into the Ready for Test column, thus making it ready for testing.
Make sure you Assign the items to the team member responsible for the testing.

As Testers start working on the items, they will move it in the Test In Progress column.

Achieving completeness is a process as well. To make sure the items are really done before moving on, testing must be integrated throughout the lifecycle. This means testing should be done feature by feature, rather than a group of at the very end of the sprint.
This is how you make it possible for certain issues to be noticed early, leaving time to fix them until the end of the sprint.
So once a certain issue in a particular item is noticed during the testing, make sure you address it properly.
You can do this by adding a specific Tag in the item title in order to emphasize the items with issues or bugs. An example would be #TestFailed
It is also important to provide details about the issue in the Comments section to make it possible to understand how it should be tackled.

Make sure you Assign the item with issues to a developer or team member so he can work on fixing it while still in the sprint.
Or, you can move this item back to the Product Backlog column and replan it for the next sprint.

Once the items have passed the testing and the acceptance criteria are met, they are considered to be done.
Take note the definition of done is what needs to be a common understanding among all team members. To learn more about how to bring team members on the same page when it comes to the “definition of done”, check out this advice from Ron Jeffries.
In order to make the status of these items visible for everyone on the team, make sure you drag them into the Done column.

Step #5 Closing the Sprint
So you came to the end of the sprint.
Items in the Done column are those that will be discussed and reviewed with the whole team in the sprint review meeting.
Items that have not been completed, or have not met the acceptance criteria will be moved back to the Product Backlog column to be re-planned for the future sprints.
Conclusion
So this was a demonstration of how you can use Yanado for a “Sunny Day Scenario” Scrum Process.
It may not be a one size fits all solution, but is a good base to start your Scrum Process with.
Overall, the tool should not a be burden. This means you should adapt the tool to your process and the people, making the tool work for you.
Try it and let us know if you like it.